


Building NFTs isn’t as complicated as you think, especially with tool suites such as Truffle Suite. This article will introduce you to the Truffle Suite of tools and teach you how to use them to build an end-to-end NFT project and include the following:
- Project setup and installation using the Truffle NFT Box.
- Introduction to the Truffle VS Code extension.
- How to build and deploy the NFT smart contract using the Truffle Dashboard.
- Instructions for minting an NFT from the built-in React client with the Truffle NFT Box.
- Verification on the block explorer and OpenSea / Rarible.
Introduction to the Truffle Suite
To make life easier for Ethereum developers, Truffle provides a development environment, testing framework, and asset pipeline.
It has several features that make it appealing to both experienced and new-to-Web3 devs, and it enables developers to build and deploy dapps for many use cases. The Truffle Suite of tools has several components, including:
- A programmable build pipeline used to build console and web applications.
- Instant asset rebuilding while in development (
truffle watch) - A console that makes it simple to use your compiled contracts (
truffle console). - Contract compilation and deployment with built-in support for JavaScript, CoffeeScript, ES6, and JSX utilizing the RPC client of your choice.
Truffle Suite
Truffle comprises essential tools to help anyone quickly build and deploy Web3 projects. The tools in the stack include:
- Truffle - The development environment and testing framework.
- Ganache - A personal blockchain for Ethereum development.
- Truffle For VS Code Extension - An extension that makes creating and managing Truffle projects easier.
- Truffle Dashboard - An easy way to use your existing MetaMask wallet for your deployments and other transactions you need to send from a command line context.
- Truffle Boxes - Boilerplate projects to get up and running quickly.
Although not part of the Truffle Suite of tools, the following tools pair nicely with the stack to make development and deployment even more streamlined:
- Infura - A Web3 backend and Infrastructure-as-a-Service (IaaS) provider, offering various services and tools to blockchain developers.
- MetaMask - A crypto wallet and gateway to blockchain applications.
How To Launch an End-to-End NFT Project Using the Truffle Stack
Now that you’ve got an idea of the tools involved, let’s put them together to create an NFT project.
Prerequisites
Before getting started, we need the following prerequisites:
- Node.js and its package manager NPM.
- Verify we have Node.js installed by using the following terminal command:
node -v && npm -v
- An Infura account
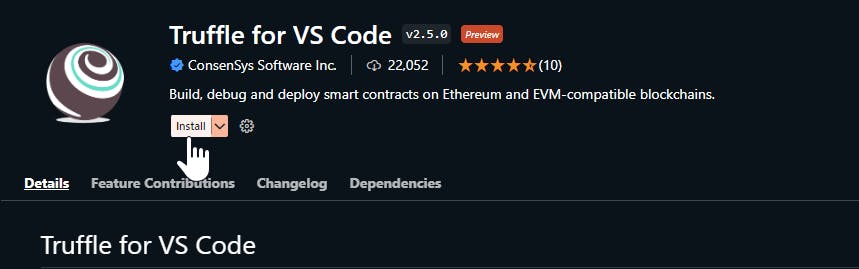
- VS Code Extension for Truffle
- Basic understanding of JavaScript and Solidity
Create an Infura Account to Access the Network
Visit the Infura website to sign up for a new account or log in if you already have one.
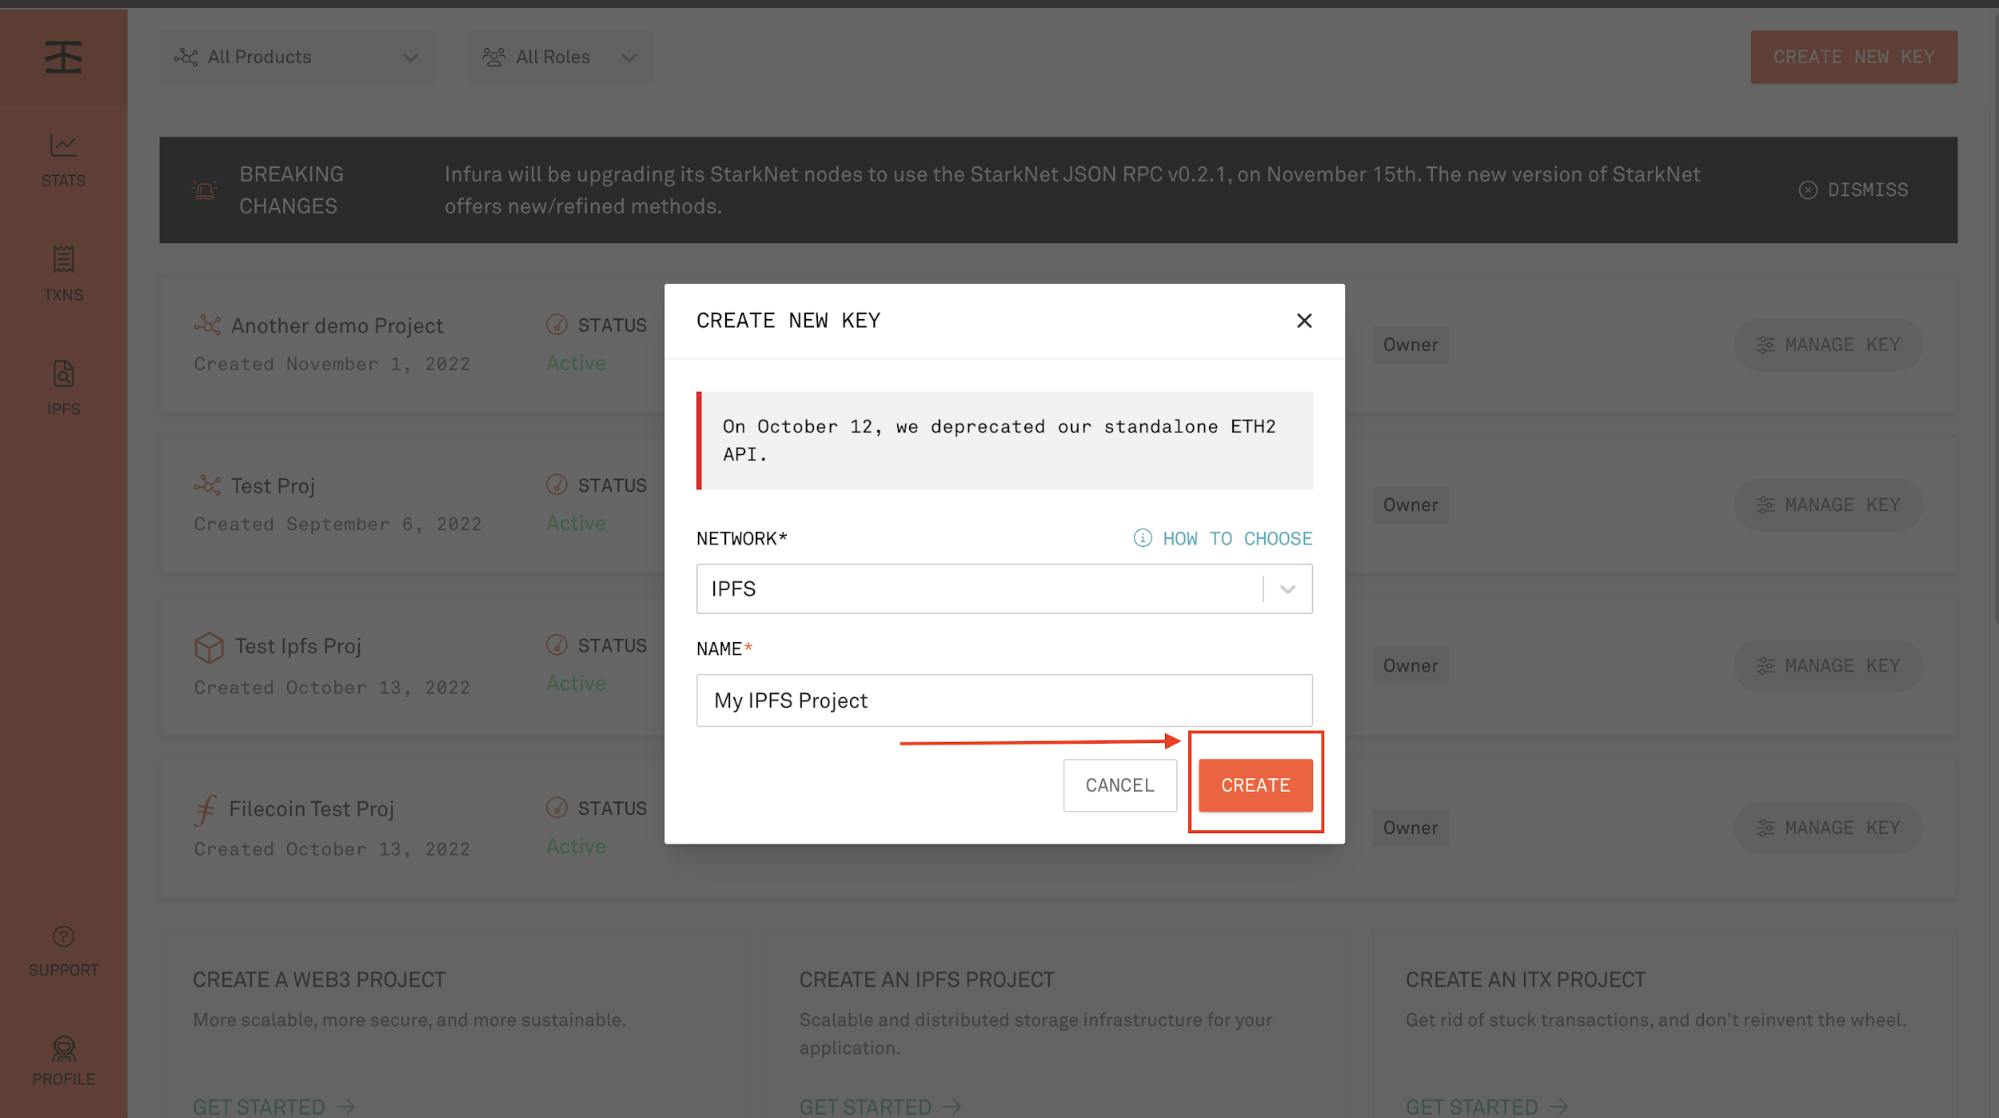
After successfully signing up, the page redirects to our dashboard, where we can create a new key, as shown below.
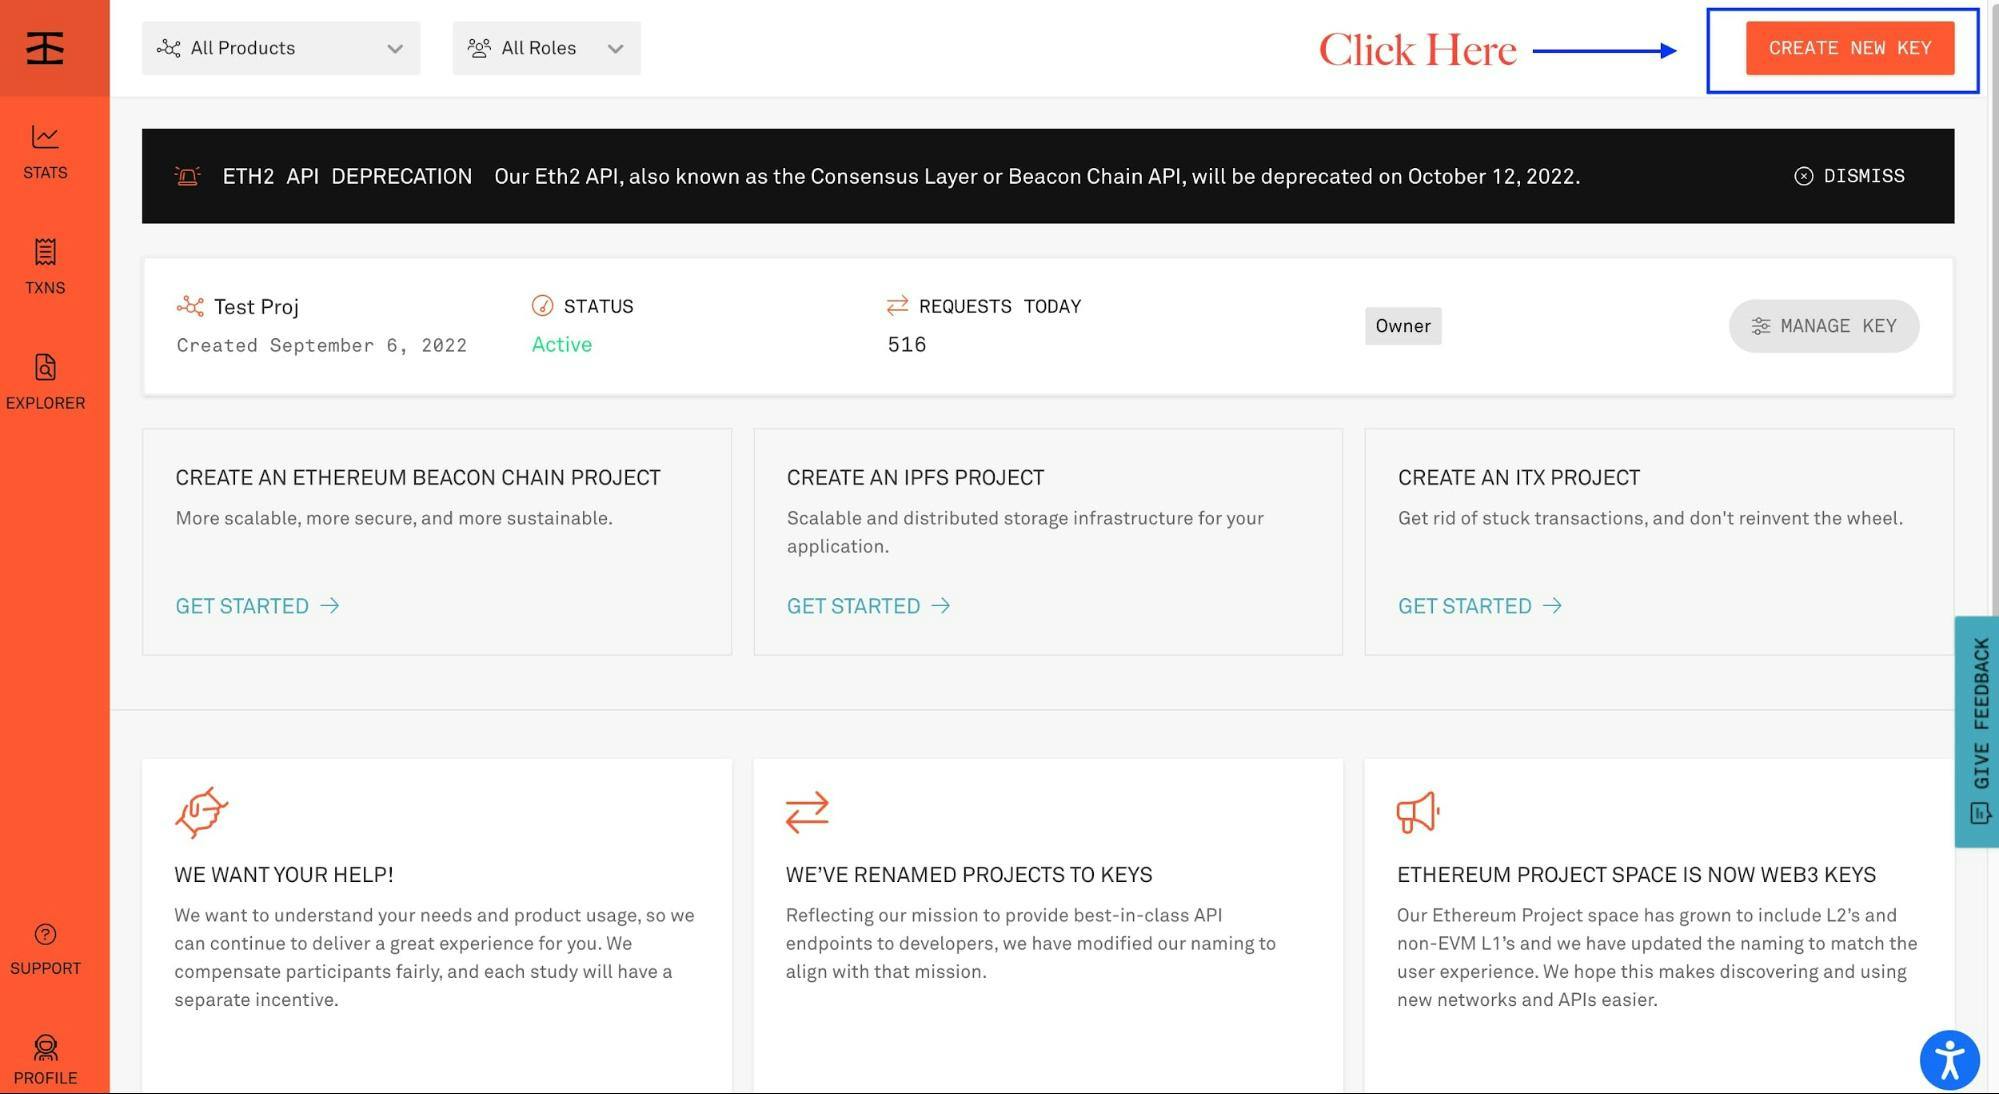
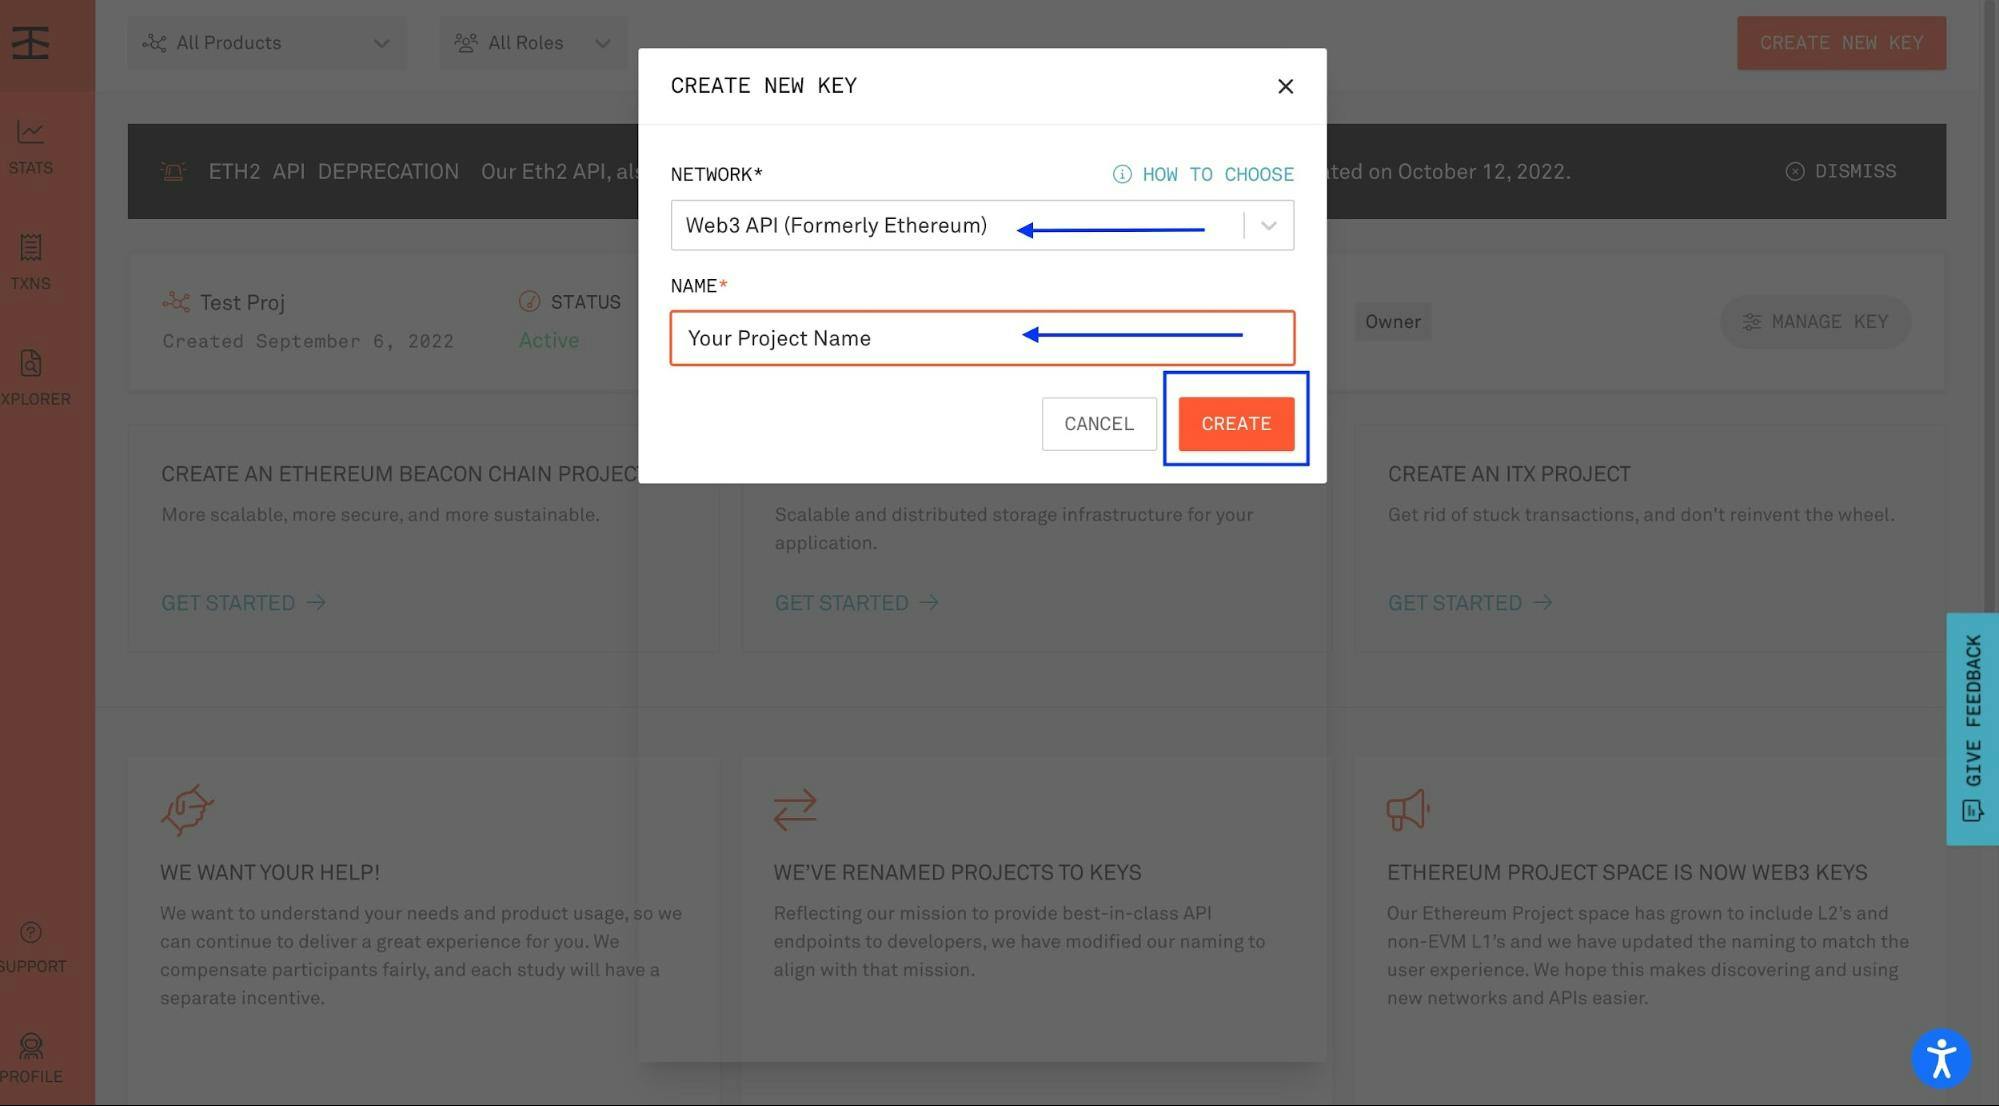
Click the "Create a New Key" button and fill in the required information.
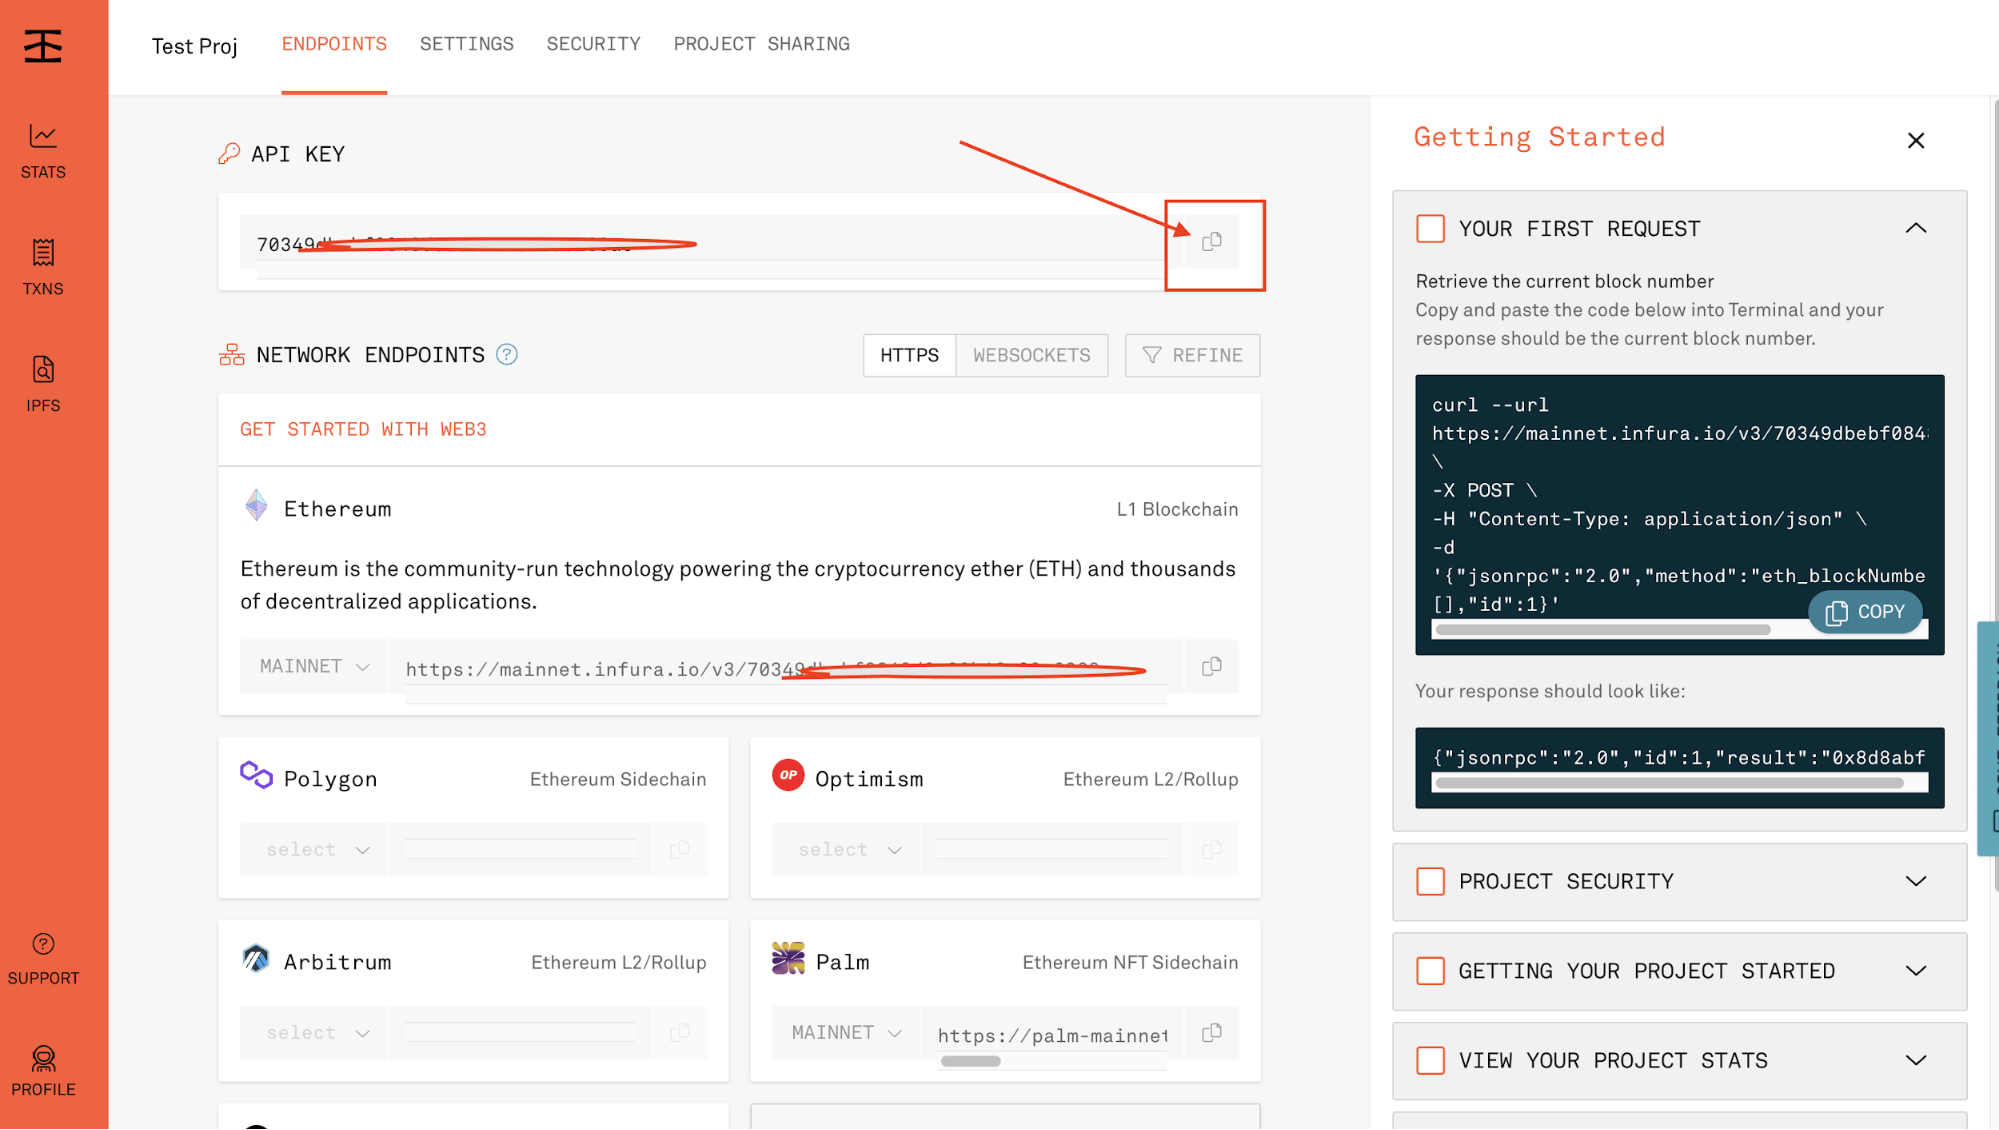
After creating your key, your project ID will be visible on your dashboard under the API Key section, as shown below. Copy and keep it somewhere; you will need it later in this tutorial.
Set Up MetaMask with Infura RPC
We will need to configure and set up a Goerli test network on MetaMask using the Infura RPC endpoint since you will build and deploy your application via the Truffle Dashboard.
Head over to metamask.io and download the extension for your browser. Understanding wallet safety is essential when using a crypto wallet like MetaMask.
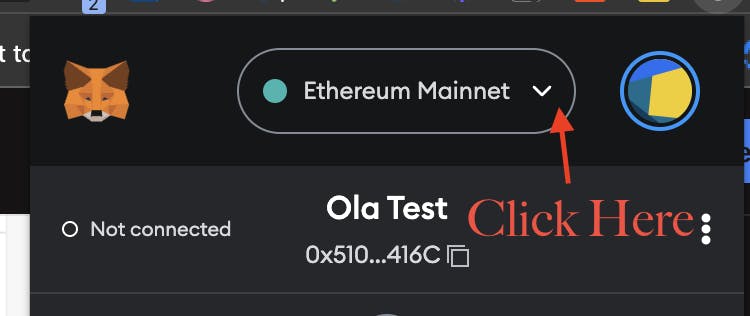
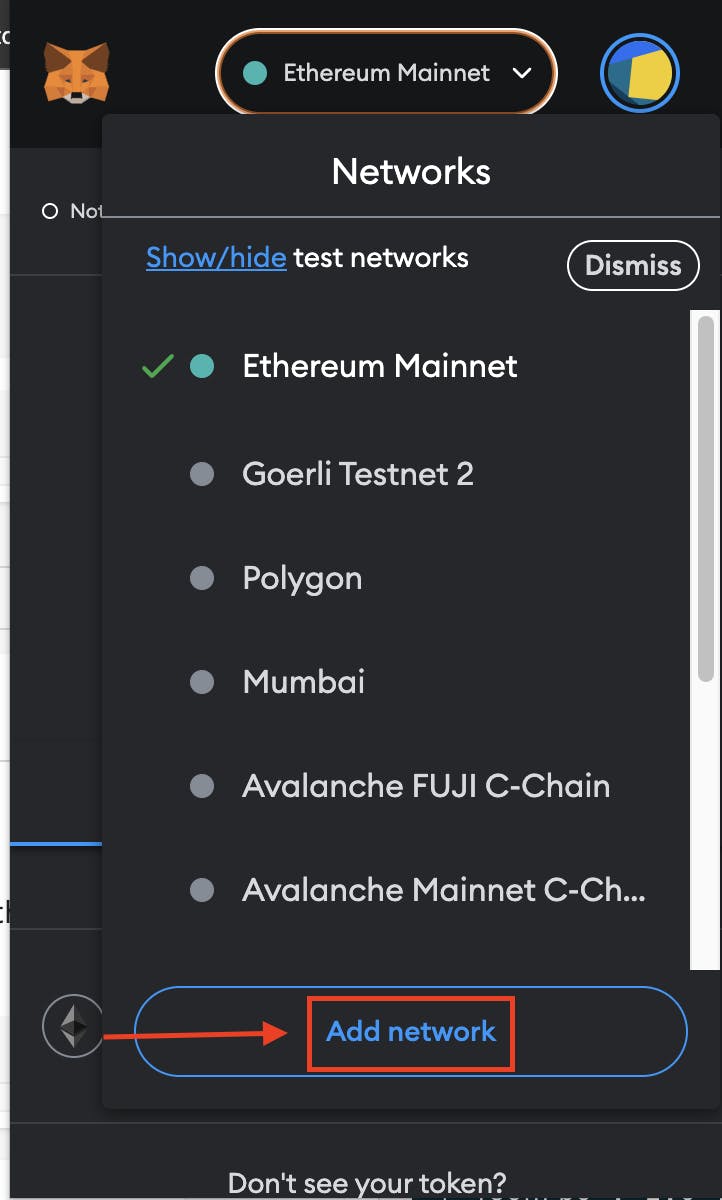
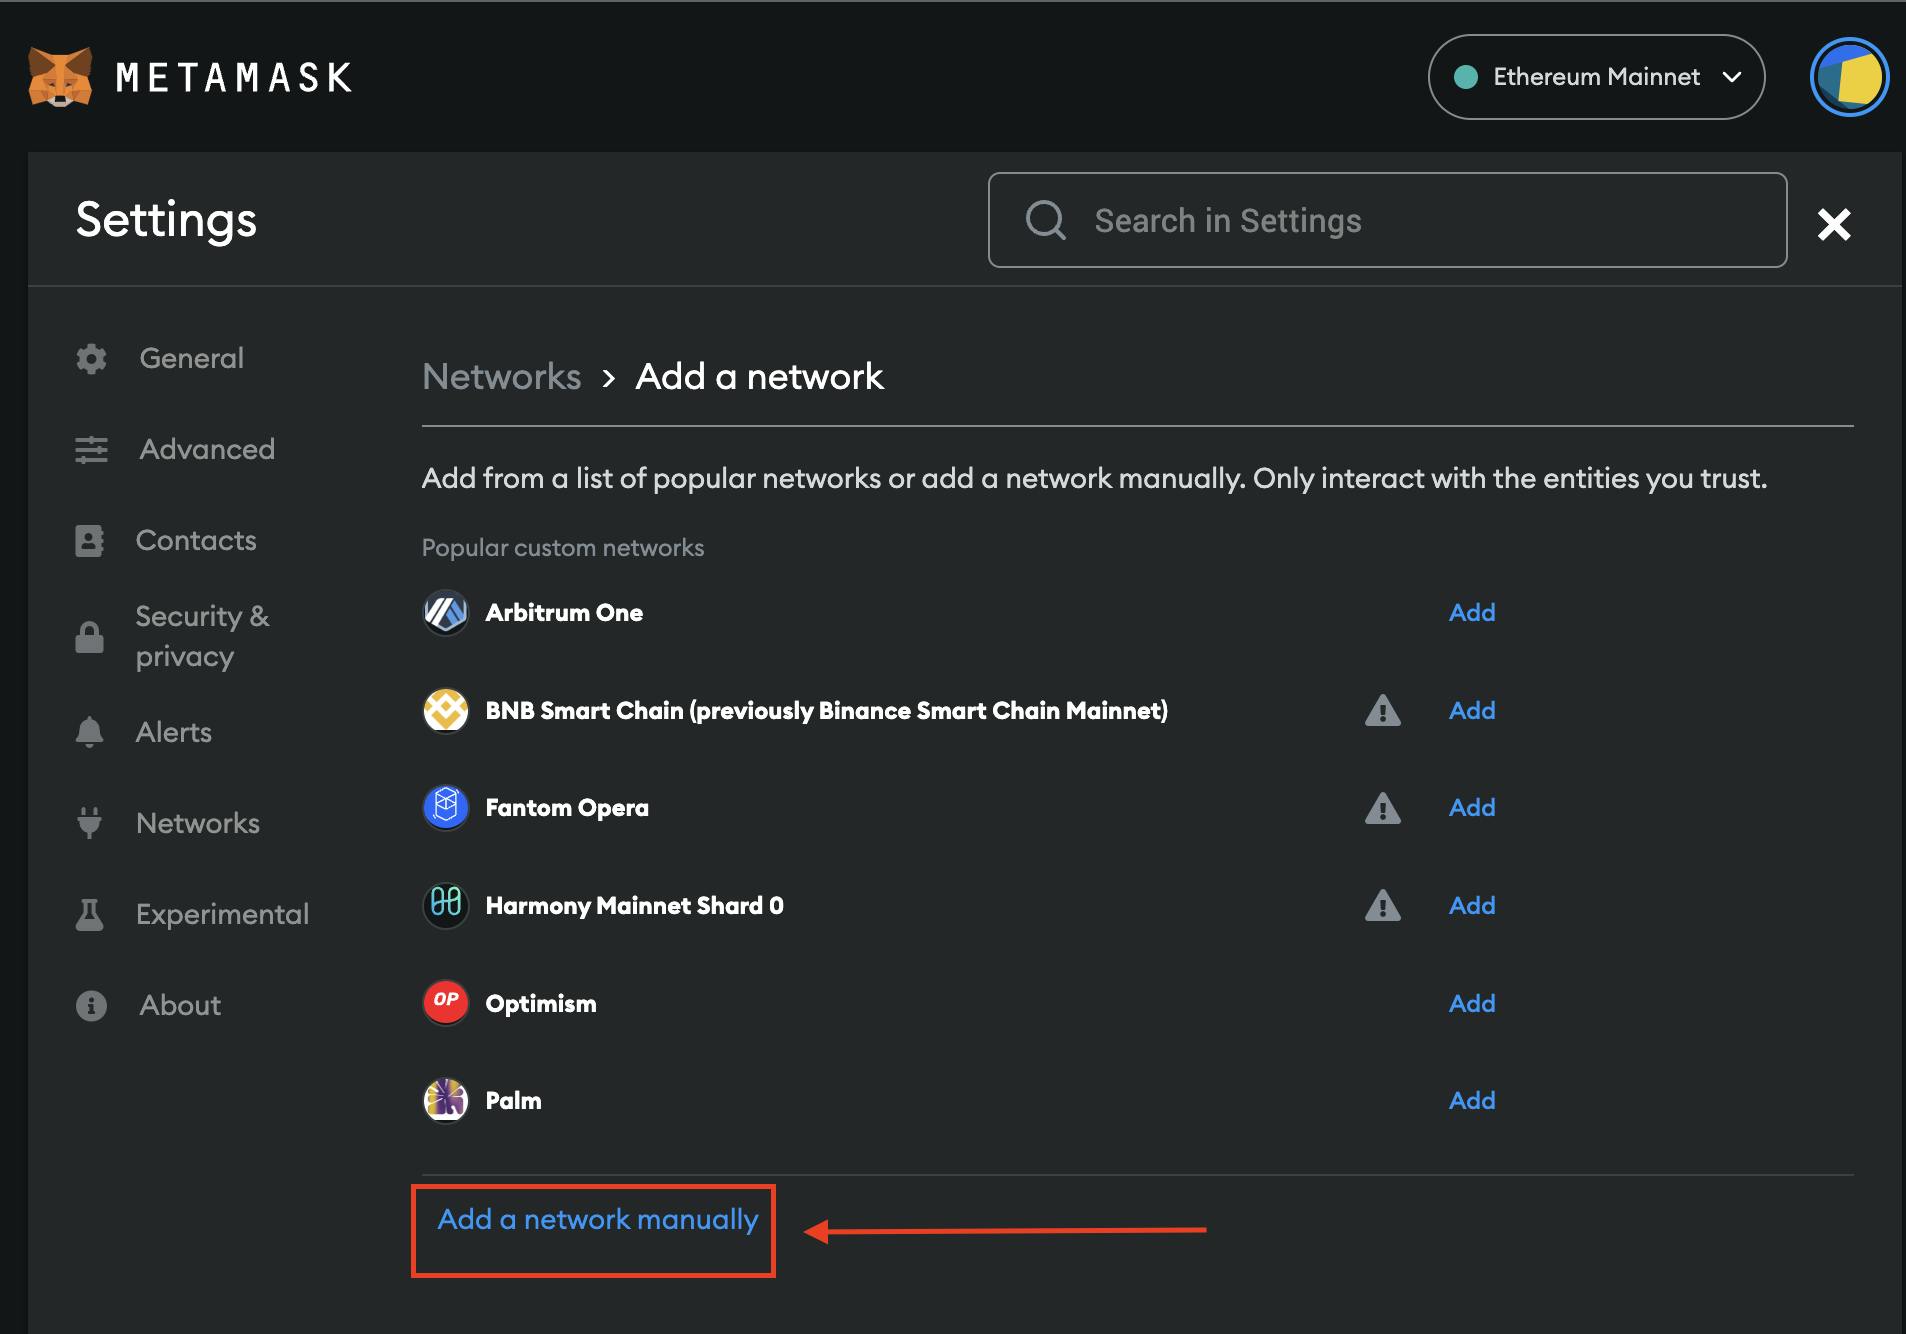
Click on Add a Network Manually as shown in the image above, then enter the following information:
Network Name: Goerli Testnet - Infura
New RPC URL: https://goerli.infura.io/v3/<Paste-your-project-id-here>
Chain ID: 5
Currency Symbol: ETH
Block Explorer URL: https://goerli.etherscan.io/
End-to-End NFT Project Setup with the Truffle NFT Box and Truffle for VS Code Extension
In this section, you will set up an NFT project with the Truffle NFT Box and the Truffle for VS Code extension. Open VS Code from the folder you wish to work out of, navigate to the extensions tab, and search “Truffle for VS Code.”
With the extension installed, you can easily create a new Truffle project from a Truffle Box. Press ctrl+shift+P to open the command dialogue and type “truffle.” This will display a list of available Truffle commands.
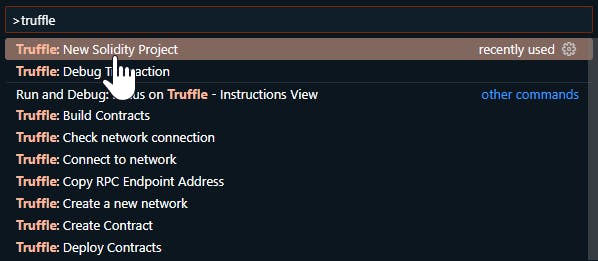
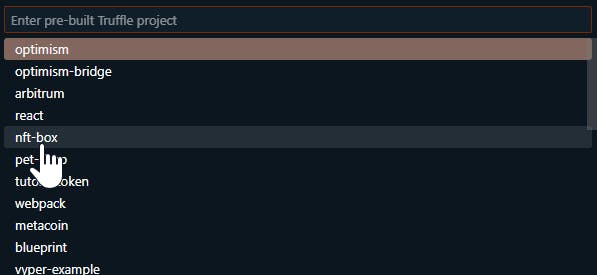
Select New Solidity Project and then Create project from Truffle Box. Next, a list of available Truffle Boxes will be displayed. Choose nft-box to create the project.
Alternatively, if you are not using VS Code as your main editor, you can still follow along. Create an NFT project from a Truffle Box in any directory of your choice using the following commands:
mkdir nft-project-demo && cd nft-project-demo
npx truffle unbox nft-box
Or you can install Truffle globally and run the unbox command.
npm install -g truffle
truffle unbox nft-box
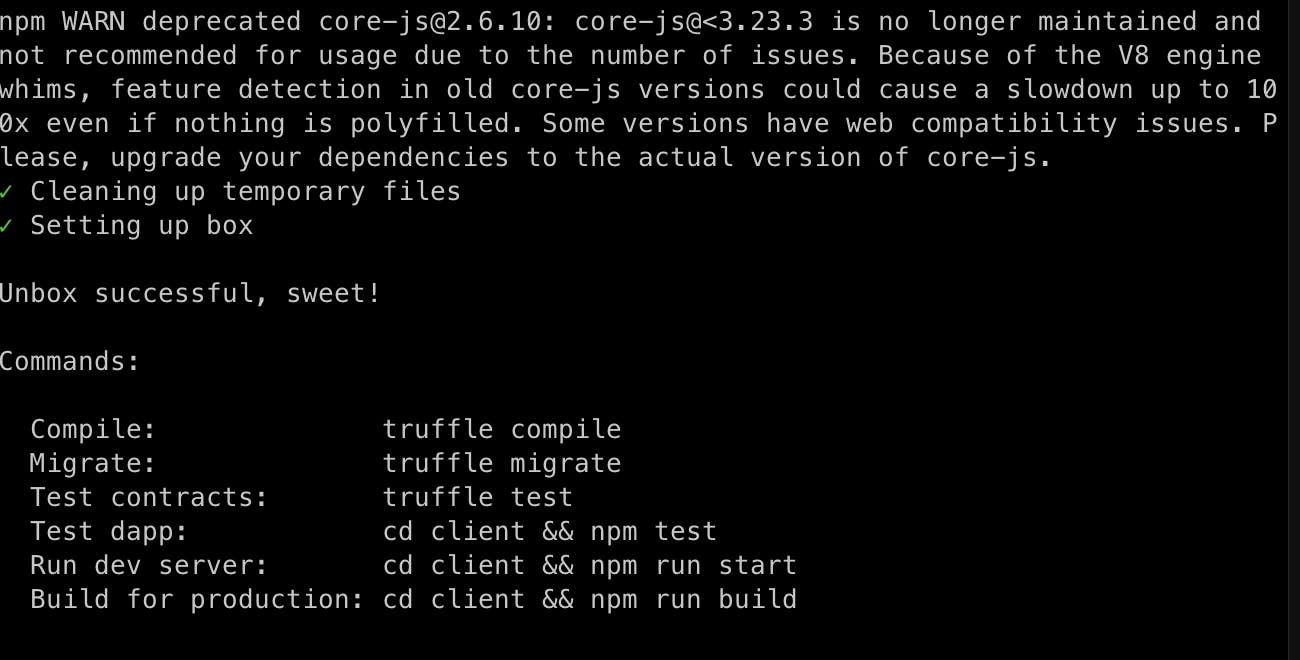
This command should download and unbox the Truffle NFT Box.
Next, cd into the new directory and download all project dependencies by running npm install.
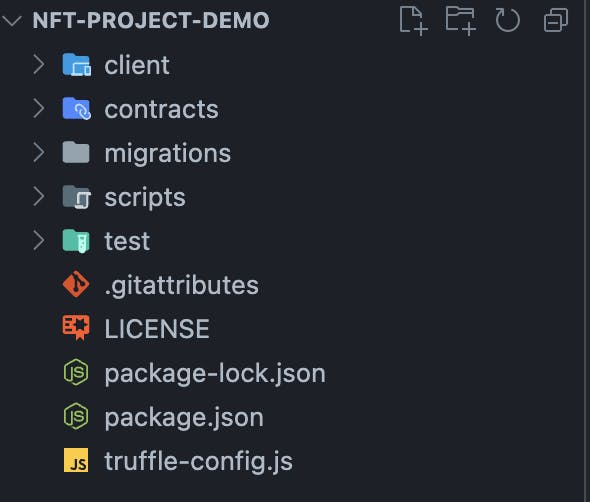
Finally, open the project in your preferred code editor. Regardless of how you created the project, you should have a project structure similar to what is shown below.
Upload NFT Metadata on IPFS
Our NFT image and metadata will be stored using IPFS. Head over to your Infura Dashboard and create another project, this time selecting IPFS as shown below.
Next, click Manage Key to view the project details.
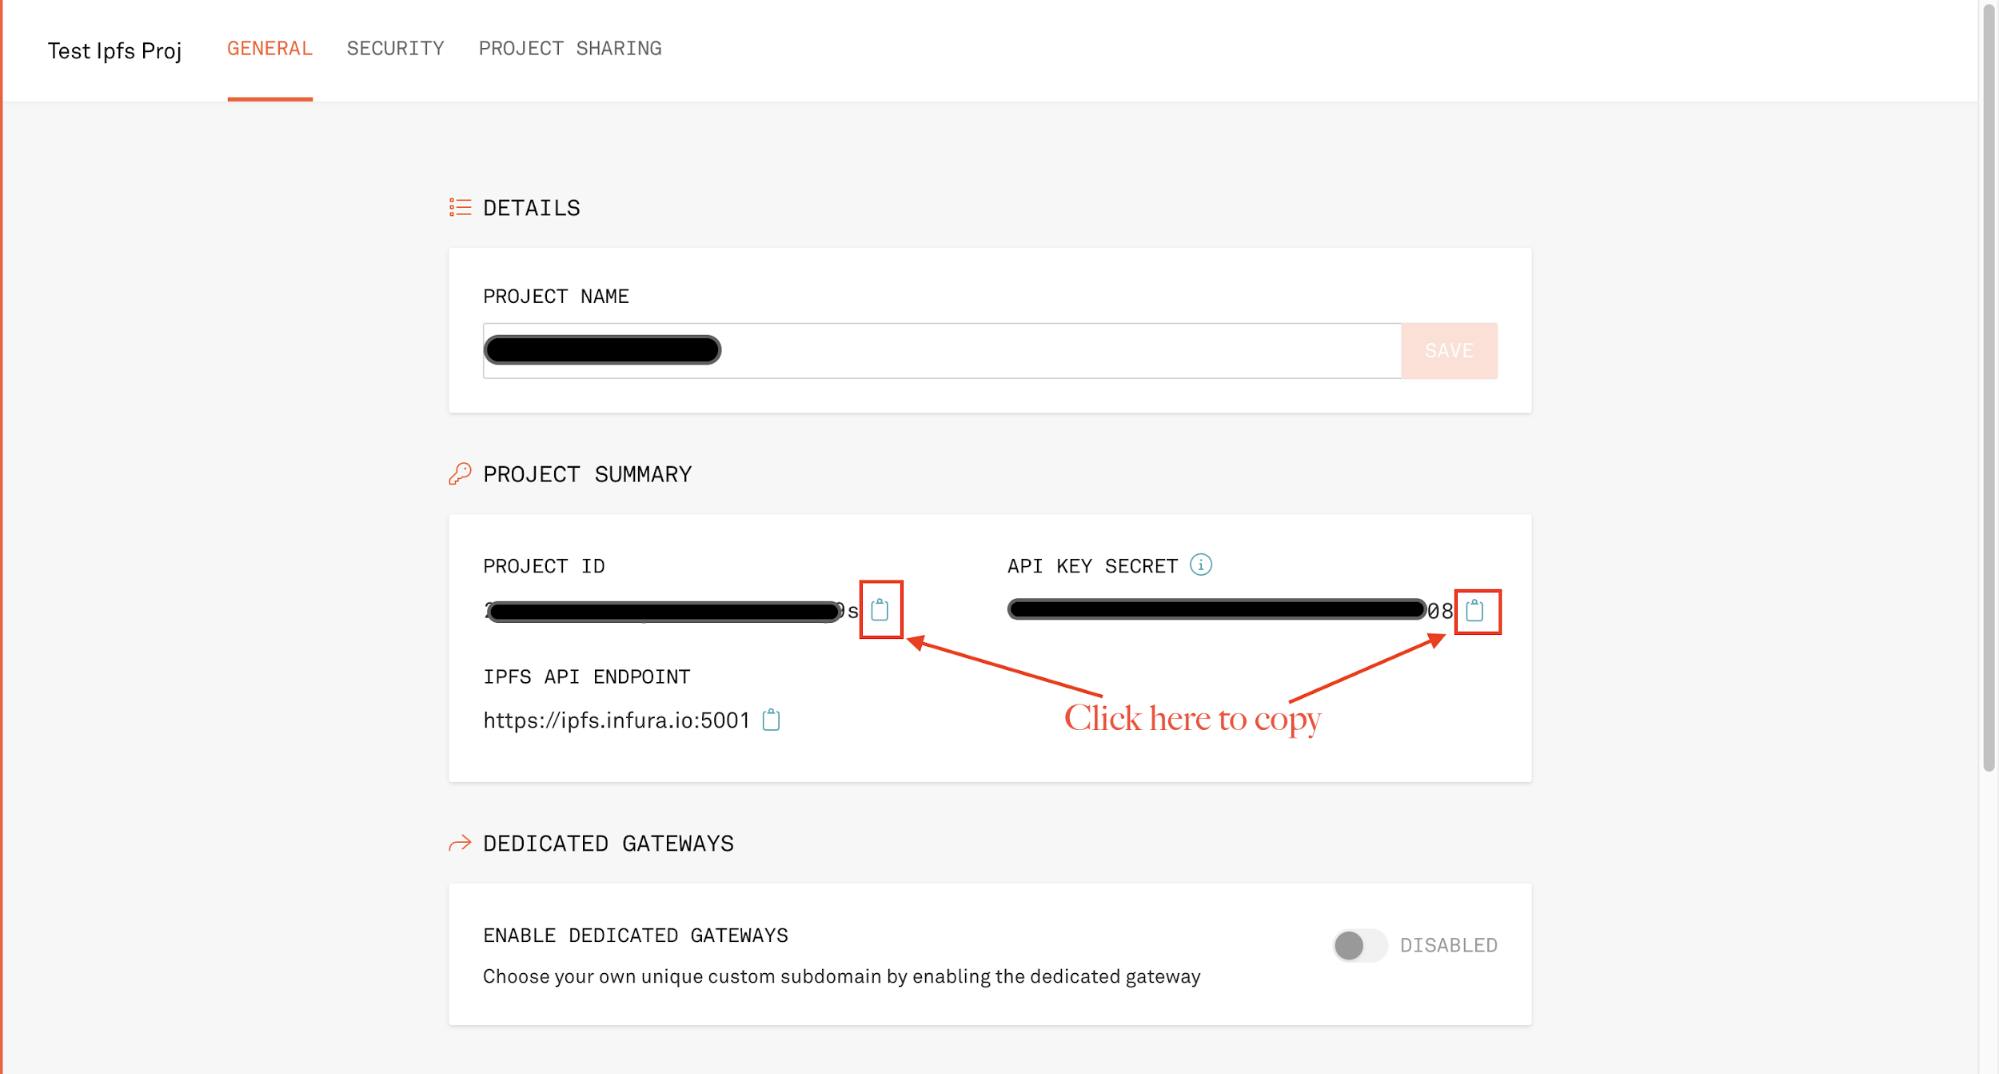
You'll need the Project ID, Project Secret, and Endpoint URL for the following tasks.
Using the following command, let's upload the image to IPFS. To upload the image, cd into the folder where the image is saved.
curl -X POST -F file=@yourfile -u
"PROJECT_ID:PROJECT_SECRET" "https://ipfs.infura.io:5001/api/v0/add"
- Replace
@yourfilewith the name of the image file in the current folder, e.g.,image-name.jpeg. - Replace
"PROJECT_ID:PROJECT_SECRET"with your project id and secret in that order.
The output from the command should look similar to what is shown below.

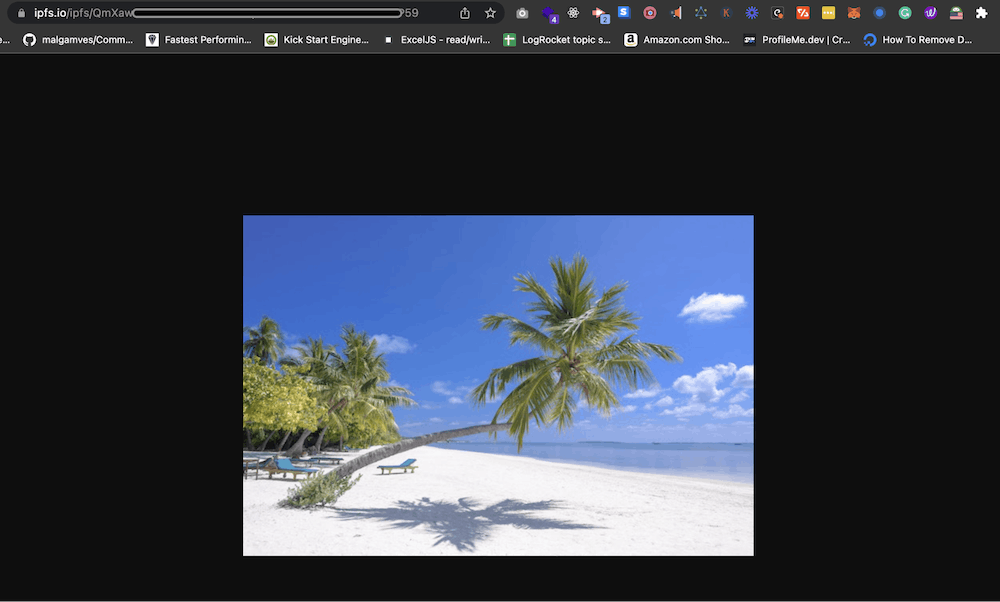
You can verify the image was uploaded successfully by pasting that Hash into the following URL: ipfs.io/ipfs/YOUR_HASH_HERE.
Note: When trying to access the image via the URL for the first time, it might take a few minutes to load.
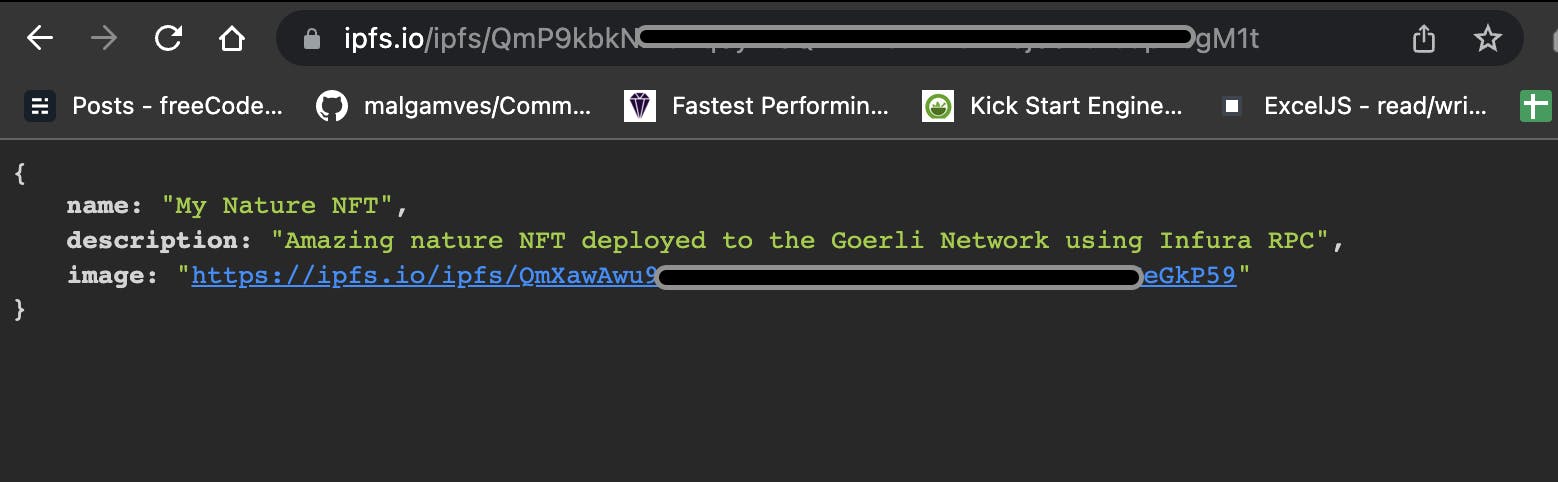
Let's get the metadata stored on IPFS now that the image is there. To comply with OpenSea requirements, you will need your metadata to be in the following JSON format:
{
  "name": "My Nature NFT",
  "description": "Amazing nature NFT deployed to the Goerli Network using Infura RPC",
  "image": "ipfs://YOUR_HASH_HERE"
}
You will use the command similar to what you used earlier to upload the image in the previous step with this command.
- Replace
@yourjsonfilewith the name of the json file in the current folder, e.g.,nft-metadata.json. - _Replace
"PROJECT_ID:PROJECT_SECRET"with your project id and secret in that order._

You can verify the JSON file was uploaded successfully by pasting that Hash into the following URL: ipfs.io/ipfs/YOUR_HASH_HERE
You have entirely set up all the tools we need to build and deploy a smart contract with the Truffle Dashboard. Let's do that in the following step.
Build and Deploy Smart Contracts with the Truffle Dashboard
Head over to the NFT project with the Truffle NFT Box we installed earlier; you will build and deploy the smart contract in this section.
Inside the 1_deploy_contracts.js file in the migrations folder, update it with the following code snippet.
var NFTCollection = artifacts.require("./NFTCollection.sol");

module.exports = function (deployer) {
  deployer.deploy(
    NFTCollection,
    "https://ipfs.io/ipfs/YOUR_IPFS_HASH_HERE",
    "NFT DEMO",
    "NFTD"
  );
};
In the code snippet above, we added the URL to the hosted JSON file on IPFS, the token name, and the symbol as the parameter to the deployer.deploy() function.
Next, you will build and compile using the Truffle Dashboard, which removes the need to interact manually with your wallet's mnemonic phrase or private keys throughout the development lifecycle.
In a separate terminal window, type the following command:
truffle dashboard
The command will automatically start Truffle Dashboard at localhost:24012 and open a new tab in your existing browser session.
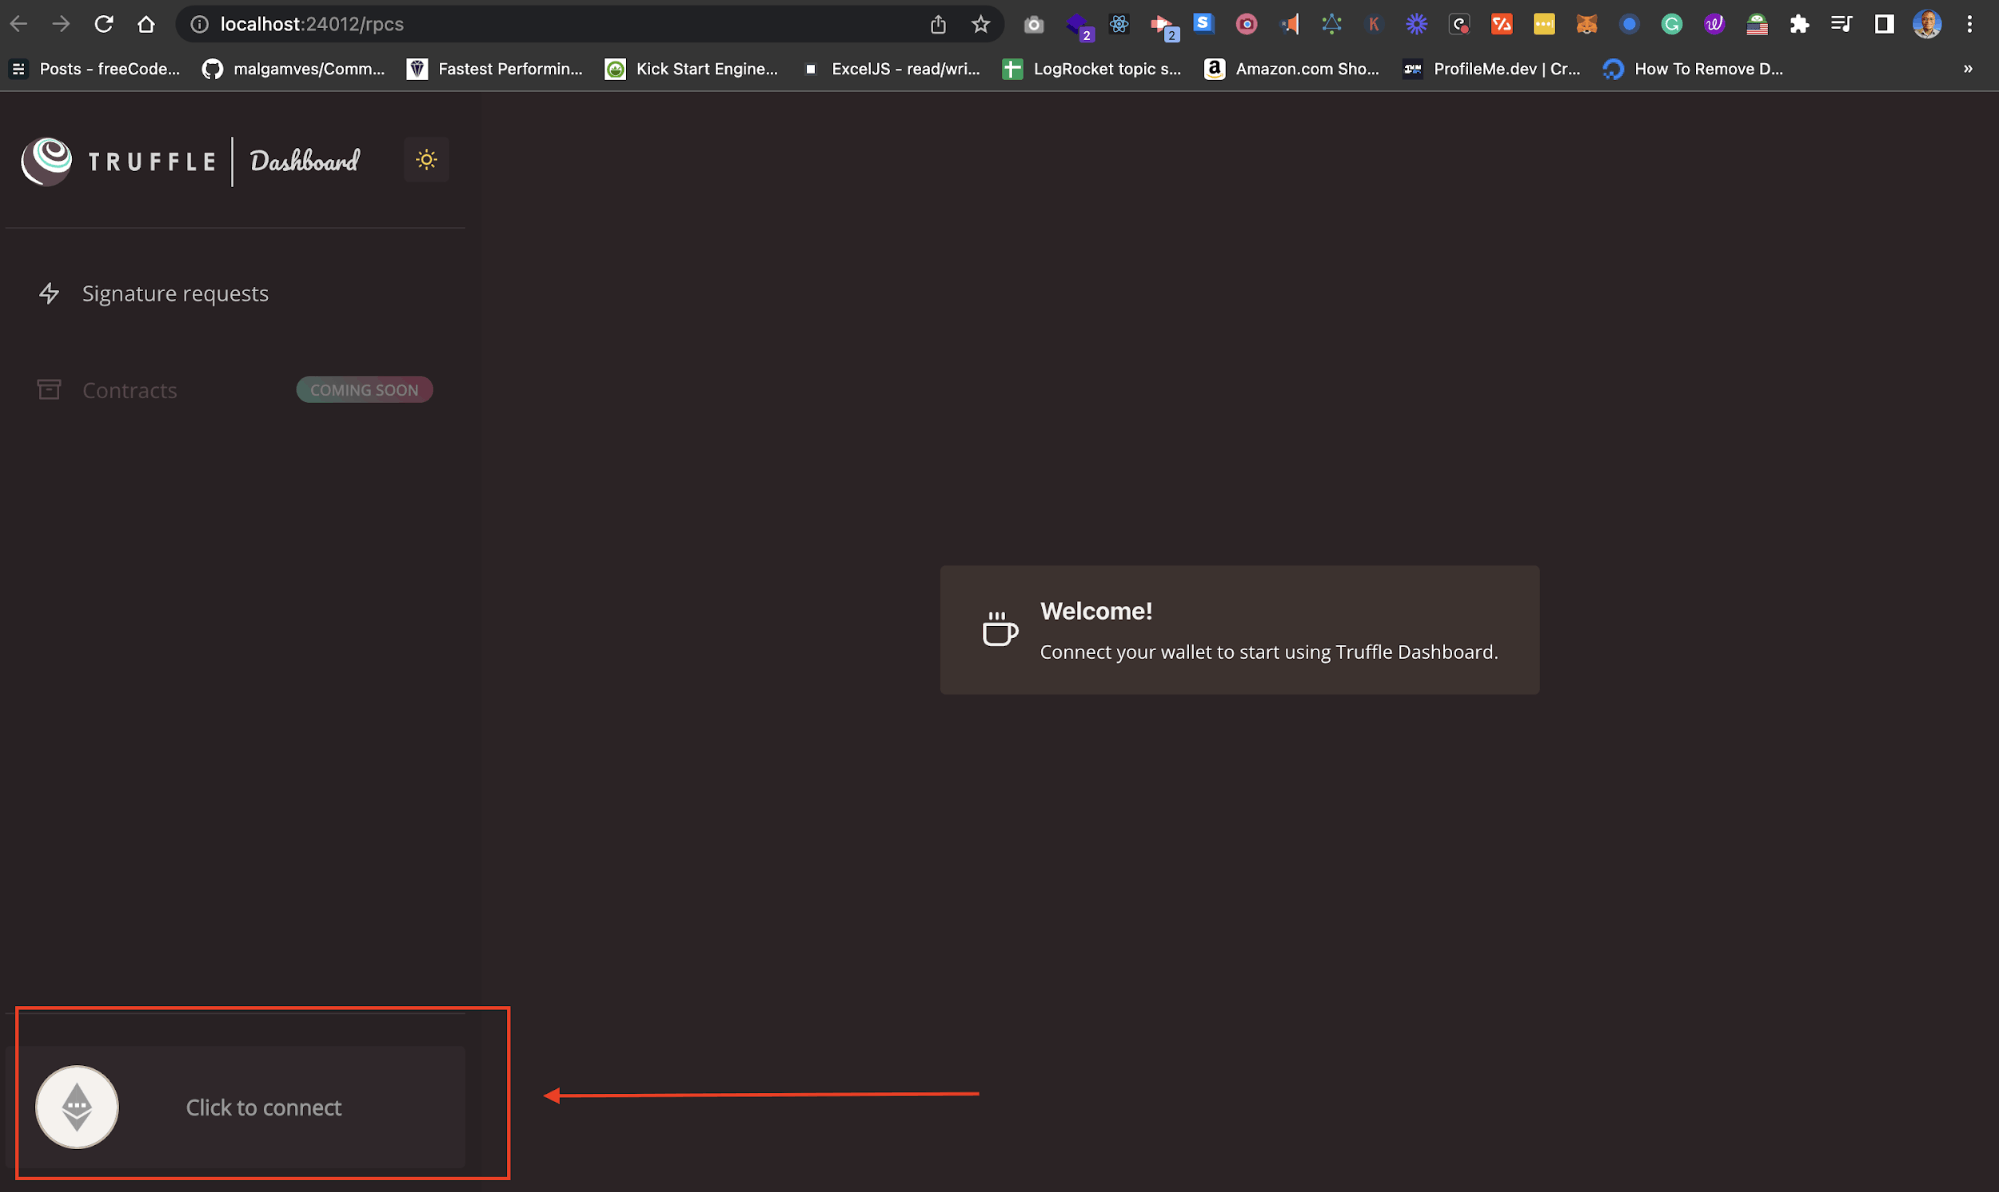
After connecting your wallet, make sure you switch to the Goerli testnet we set up and configured earlier using the Infura RPC. You should have something similar to what is shown below after successfully connecting.

Next, compile and deploy the smart contracts using the following command:
truffle migrate --network dashboard
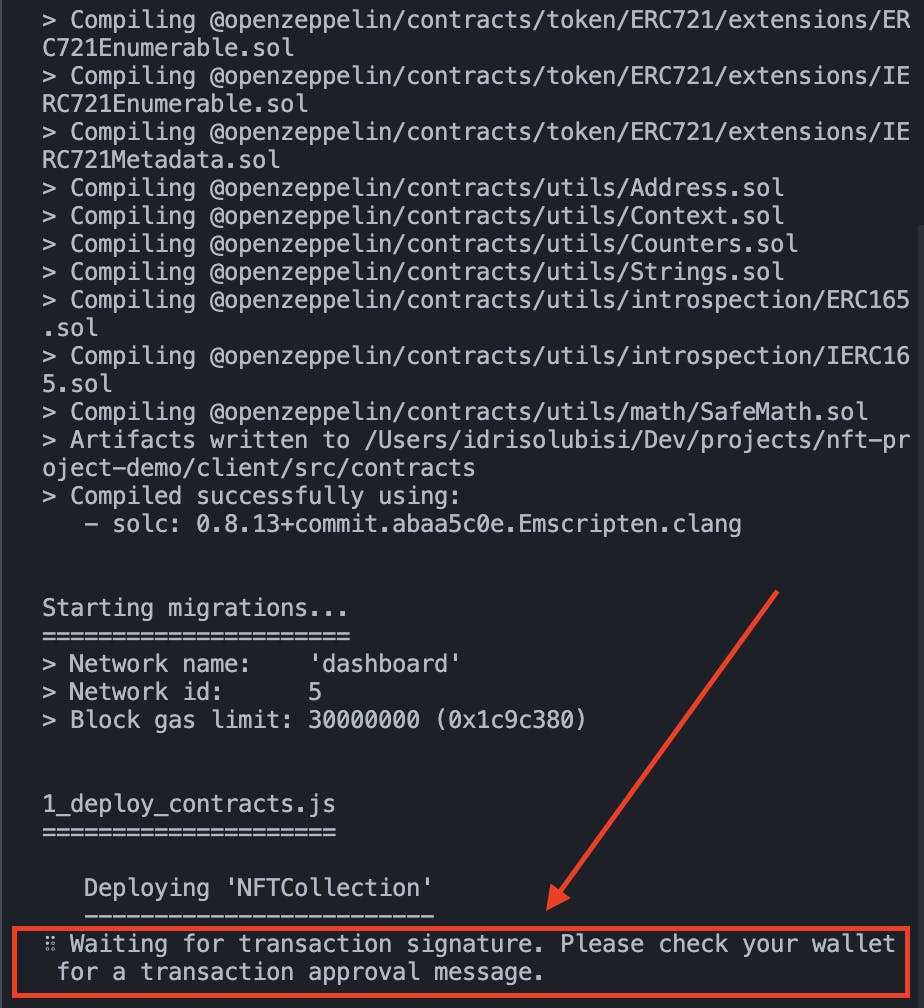
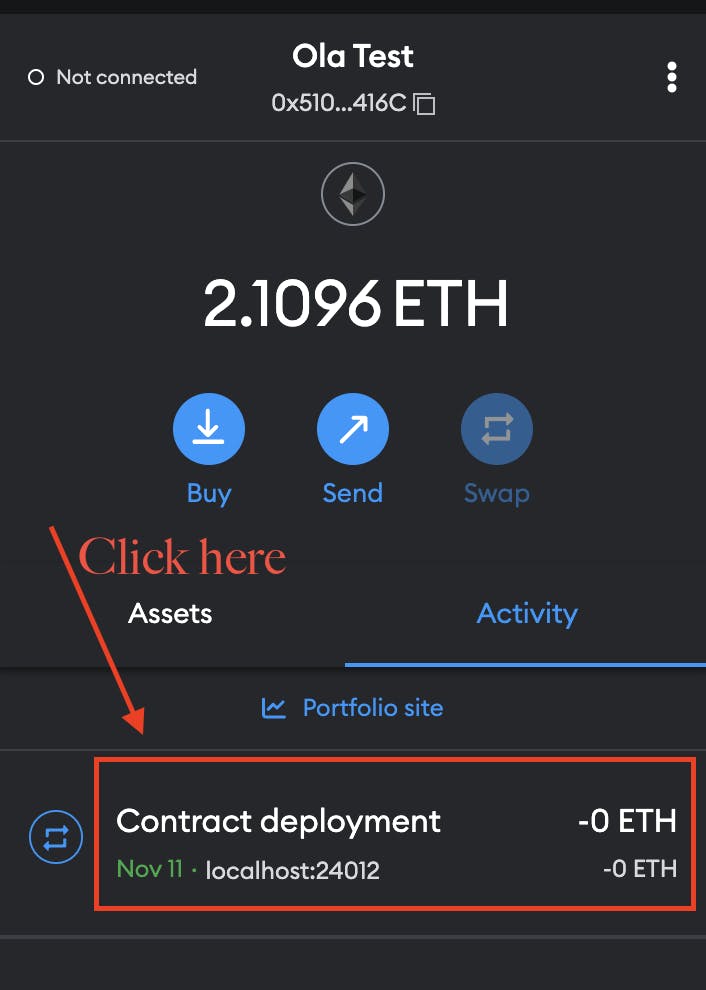
Approve the transaction via the Truffle Dashboard on your browser as prompted on the terminal.


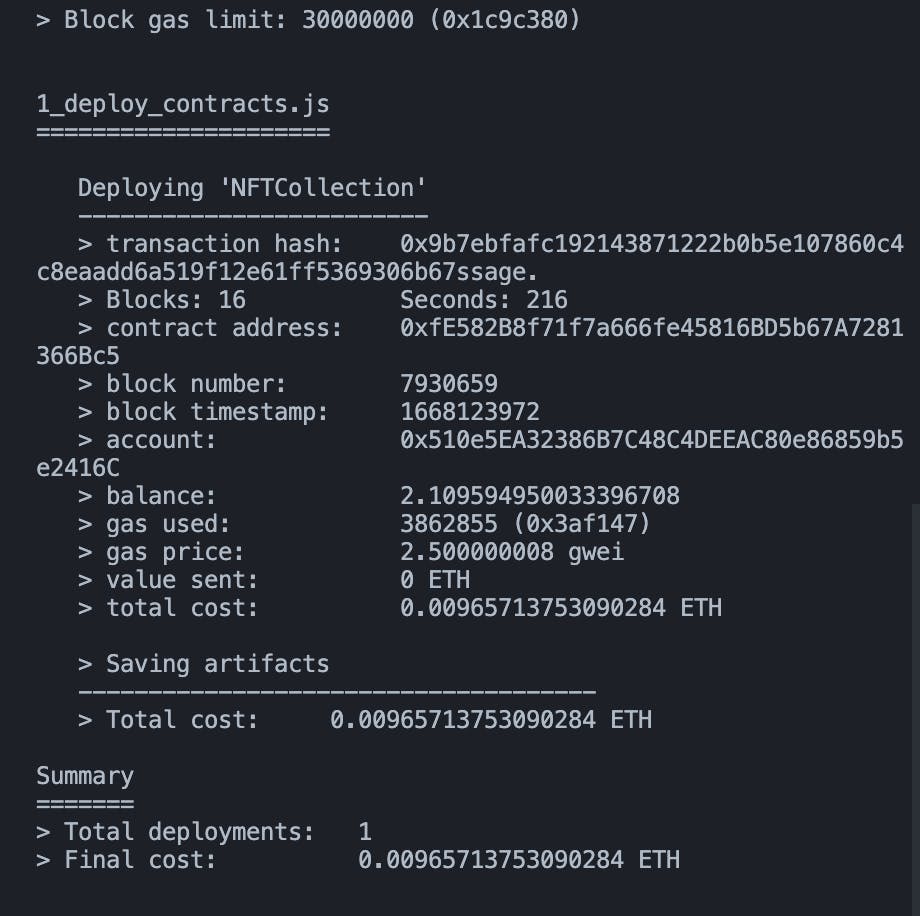
After successful deployment, you should have something similar to what is shown below on your terminal.
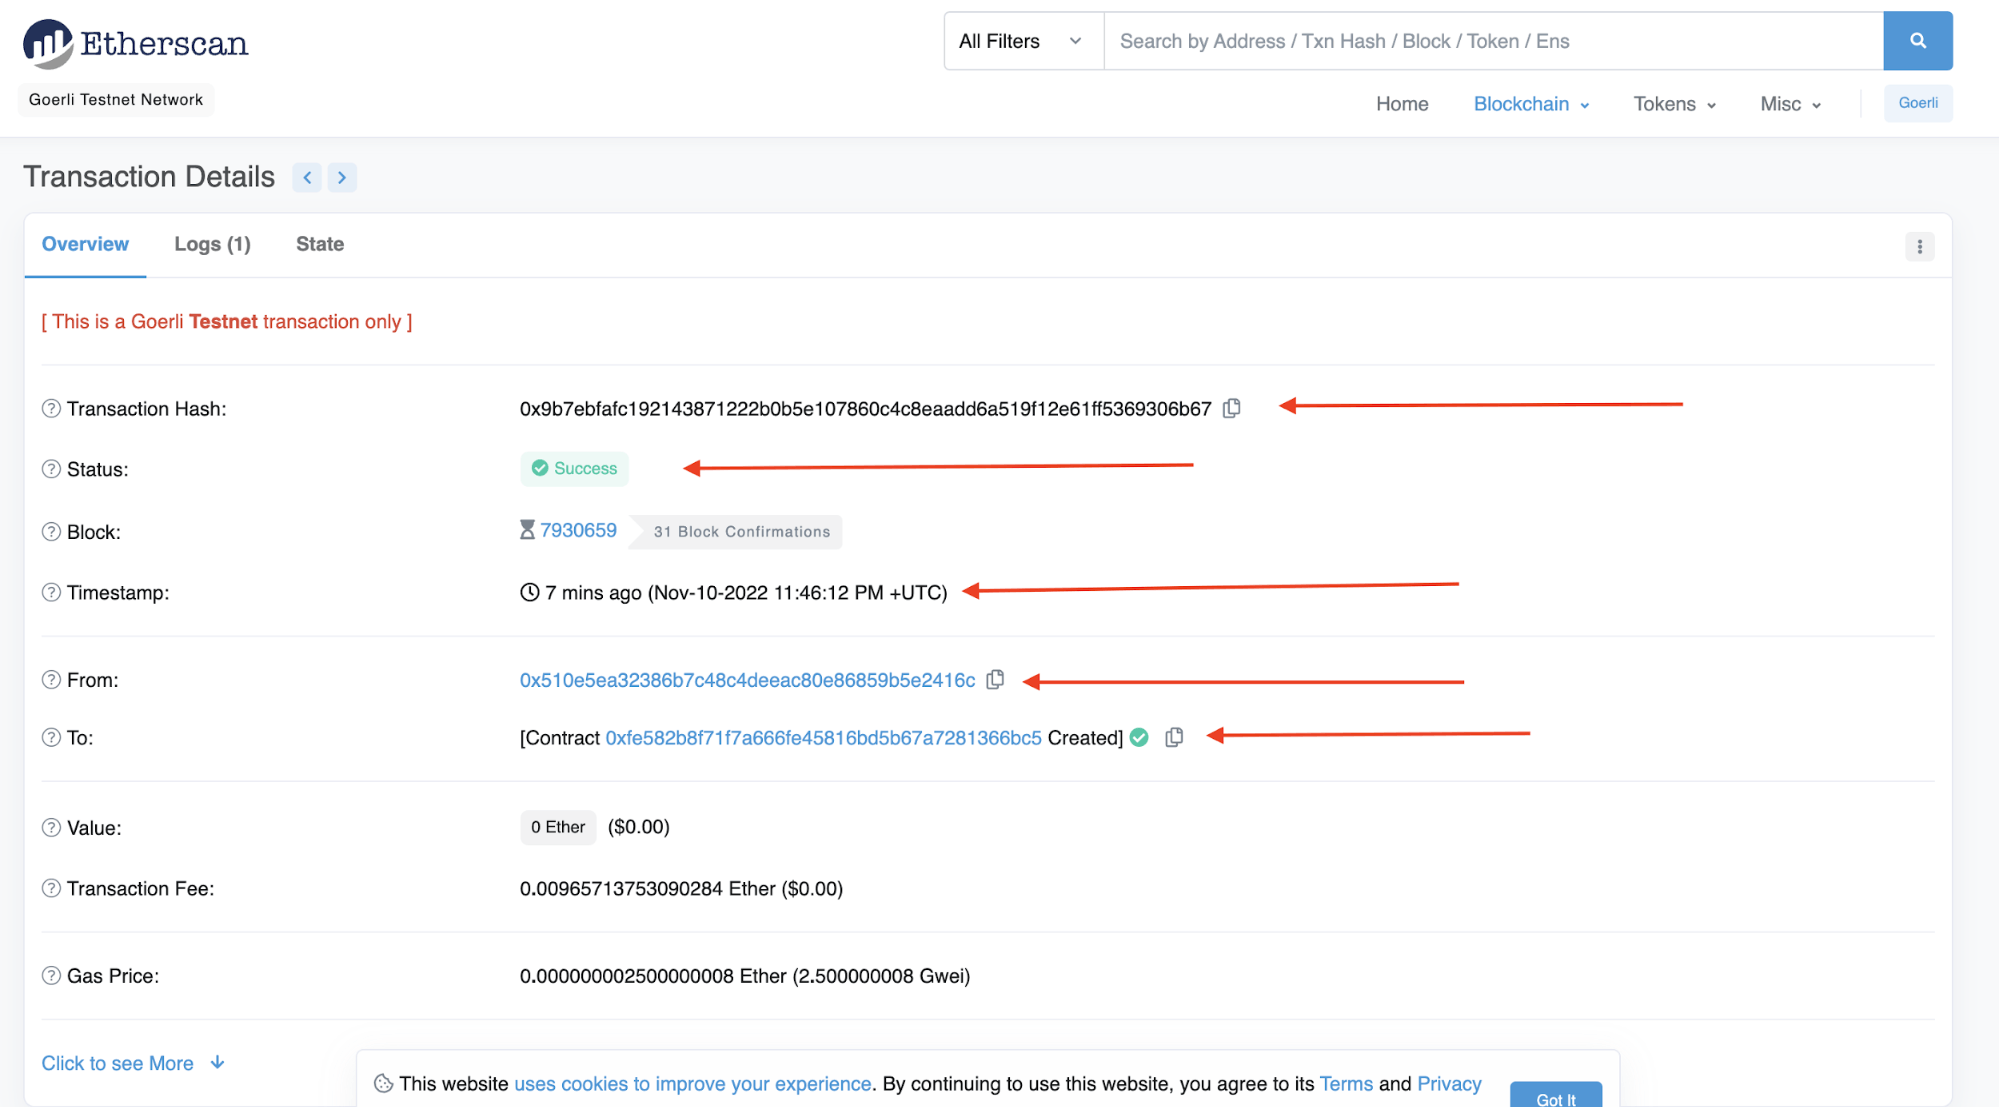
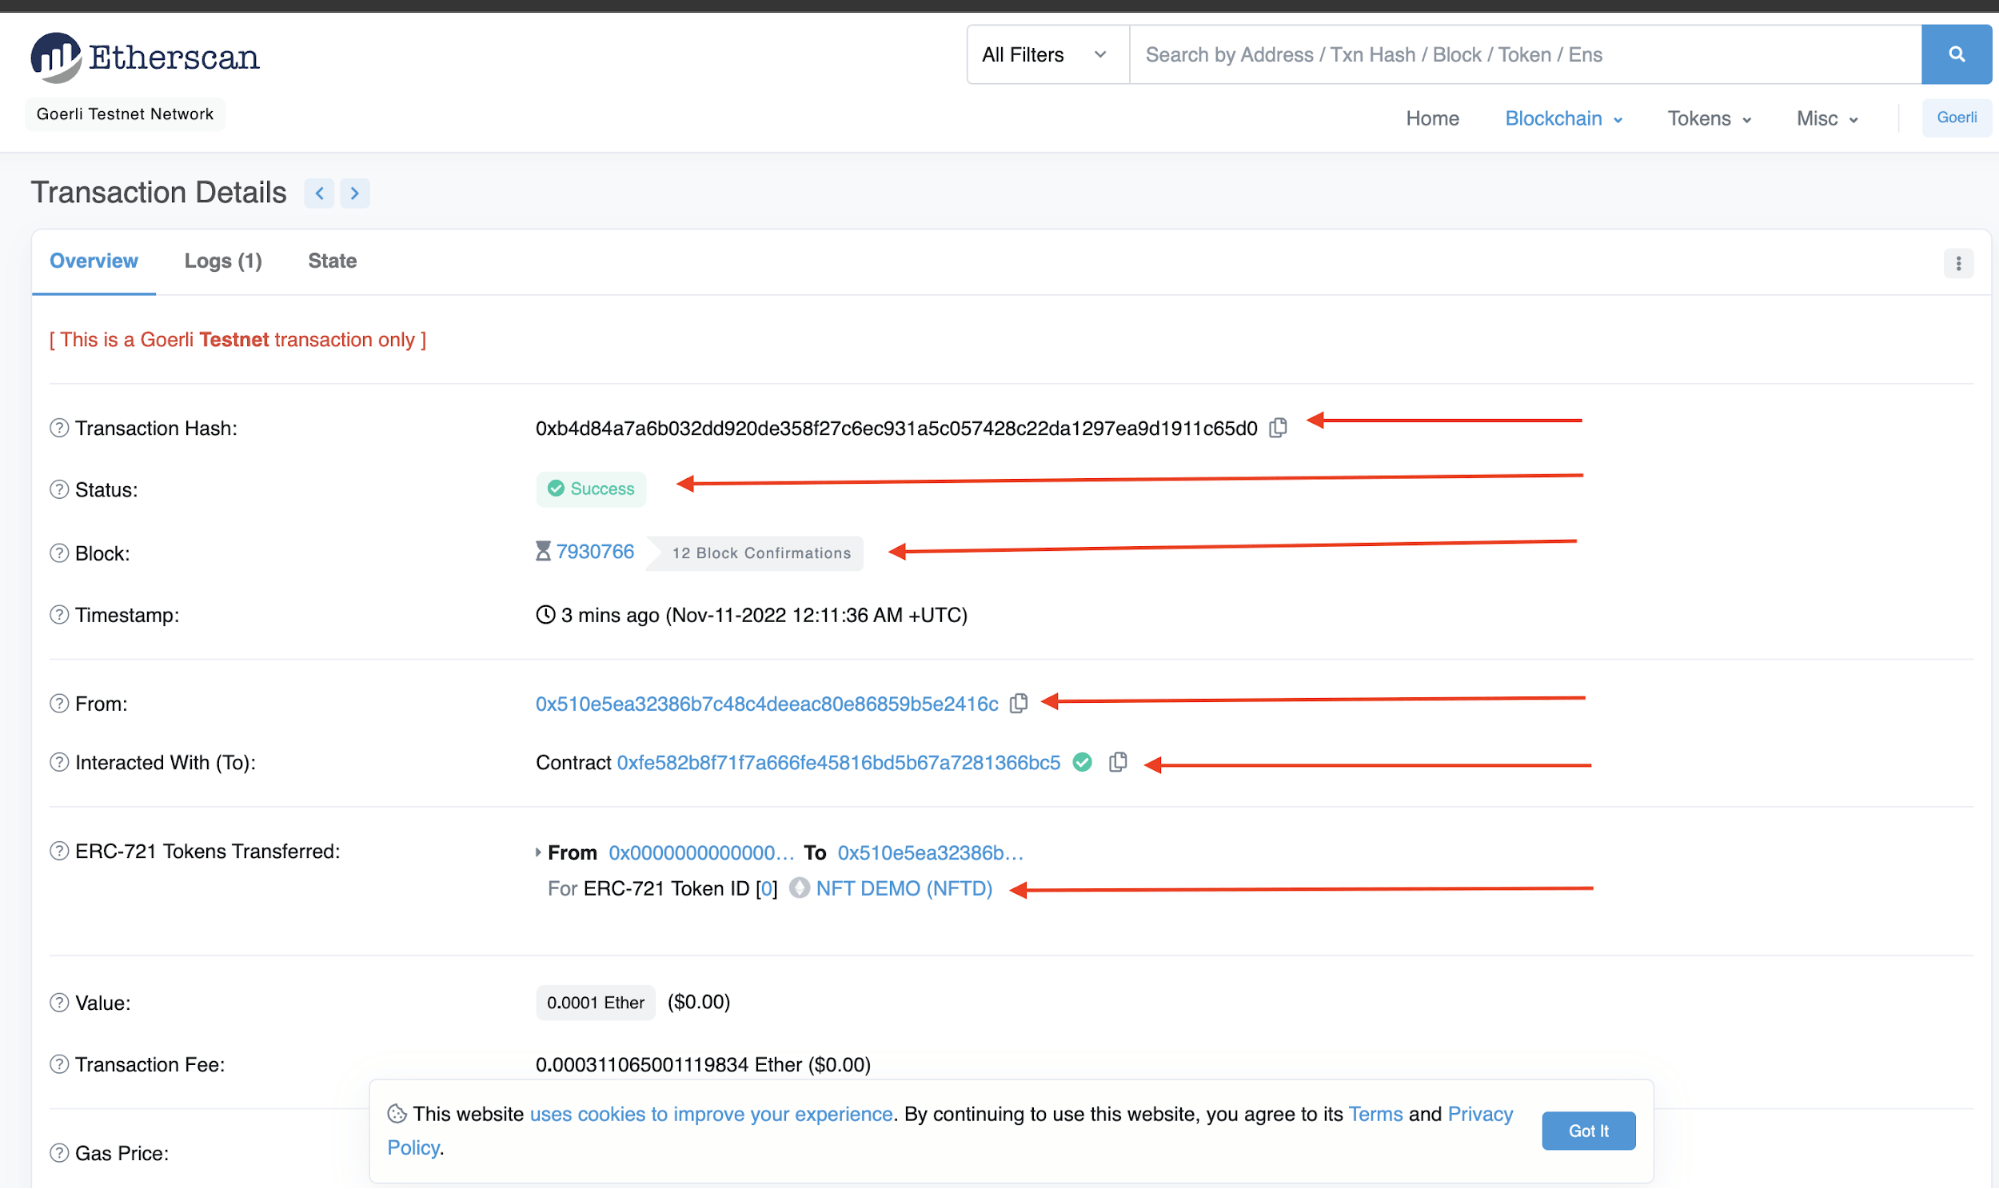
Verify Contract Creation on Goerli Testnet Block Explorer
In this section, verify the contract creation on the Goerli Testnet Block Explorer via the testnet URL by pasting the contract address or confirming from MetaMask, which will redirect to the Goerli Testnet Block Explorer as shown below.

Configure the Frontend Client and Mint an NFT
Open a separate terminal and run the following command to configure the frontend client. This will allow us to mint the NFT from the smart contract we just deployed.
cd client
npm install
npm start
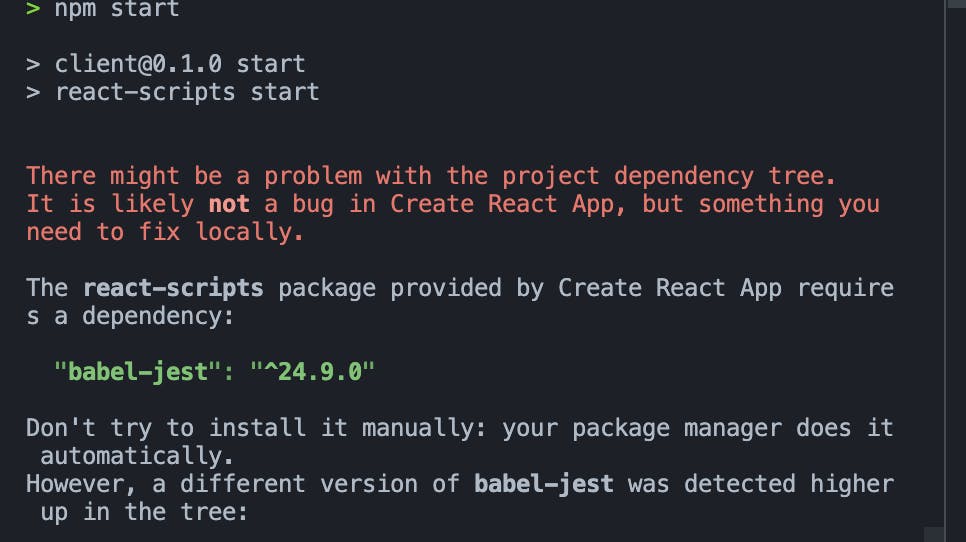
If you encounter an error similar to what is shown above, create a .env file in the client folder, add SKIP_PREFLIGHT_CHECK=true, then run the following command.
npm start
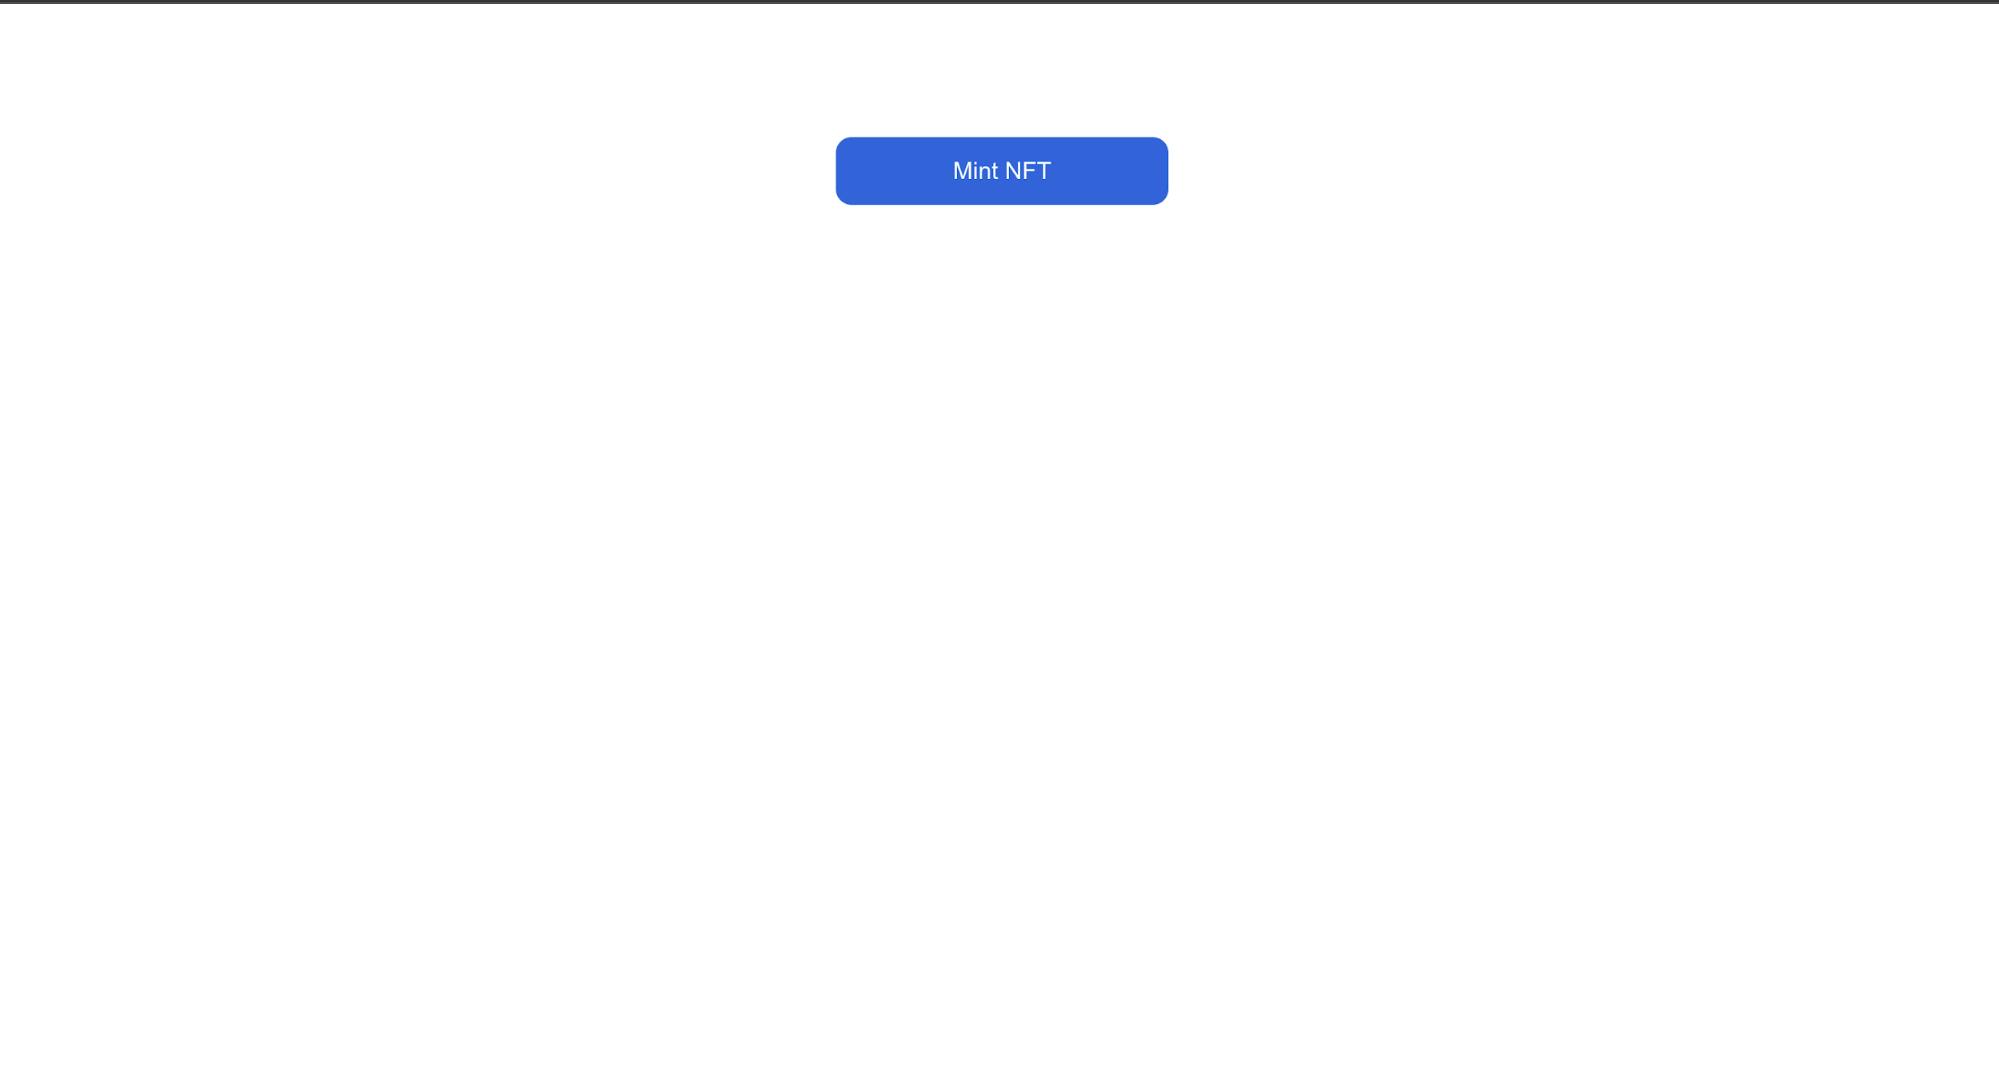
The React server will automatically start on the browser at localhost:3000, showing something similar to the image below:
Test the End-to-End NFT Project
In this section, let’s test the application to see if you can successfully mint the NFT by clicking on the Mint NFT button.
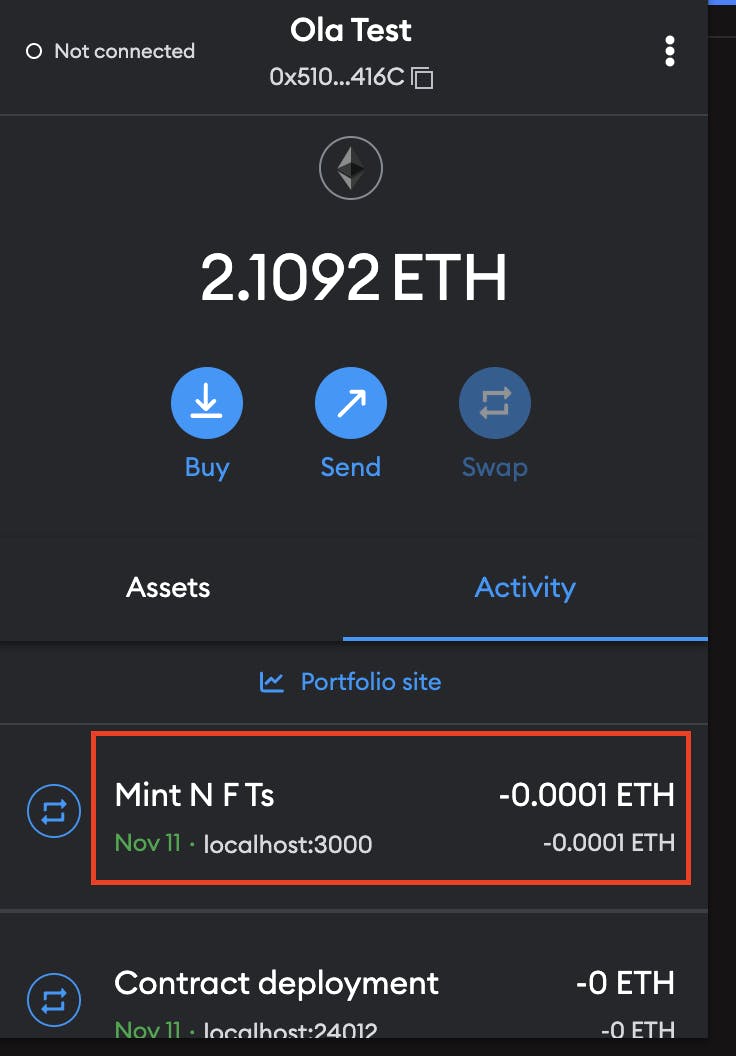
After pressing the button, you will see a MetaMask pop-up similar to what is shown below.

By clicking on the transaction below, you can confirm whether the minting is successful on MetaMask.
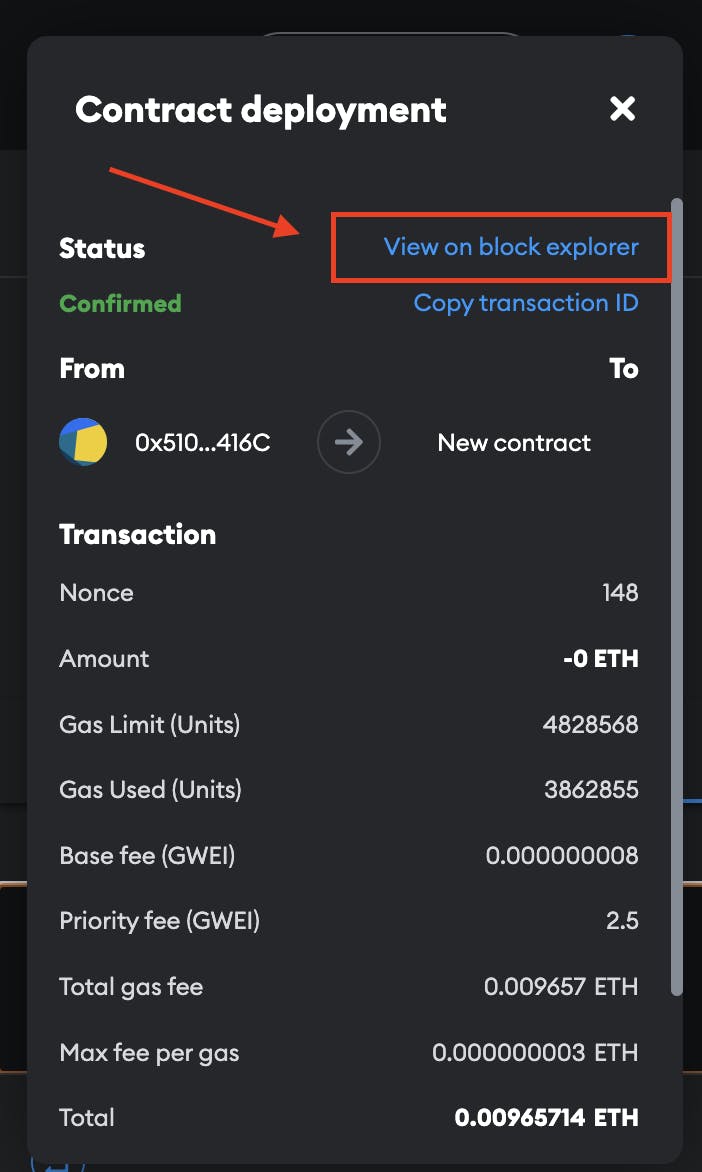
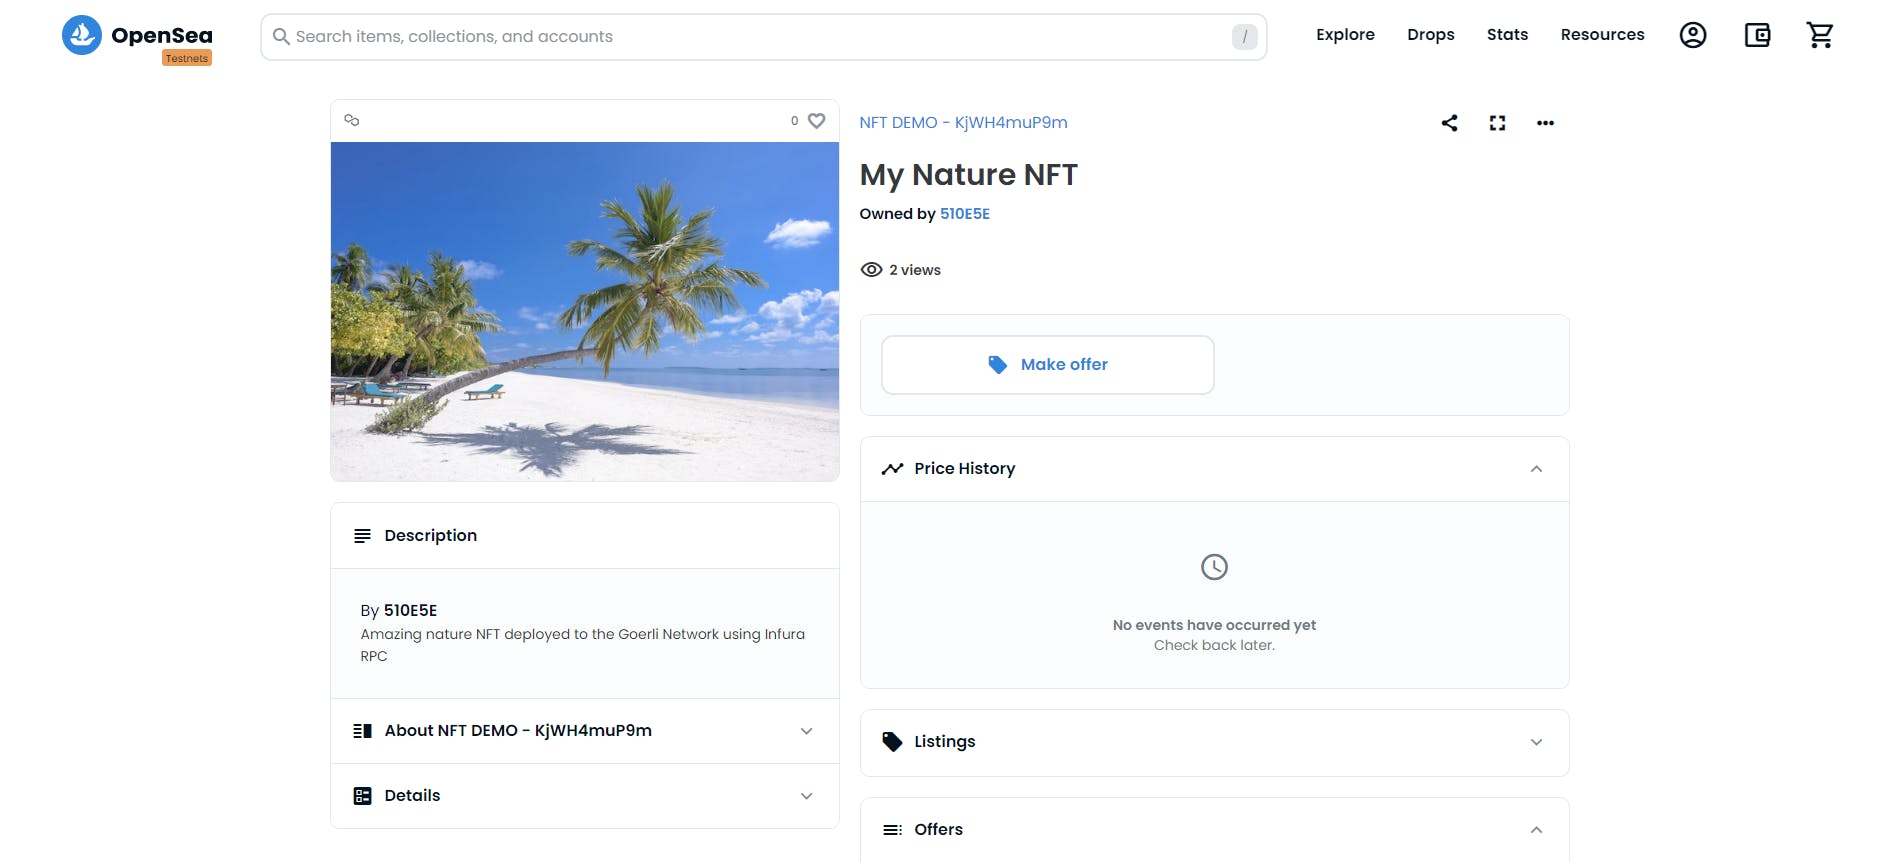
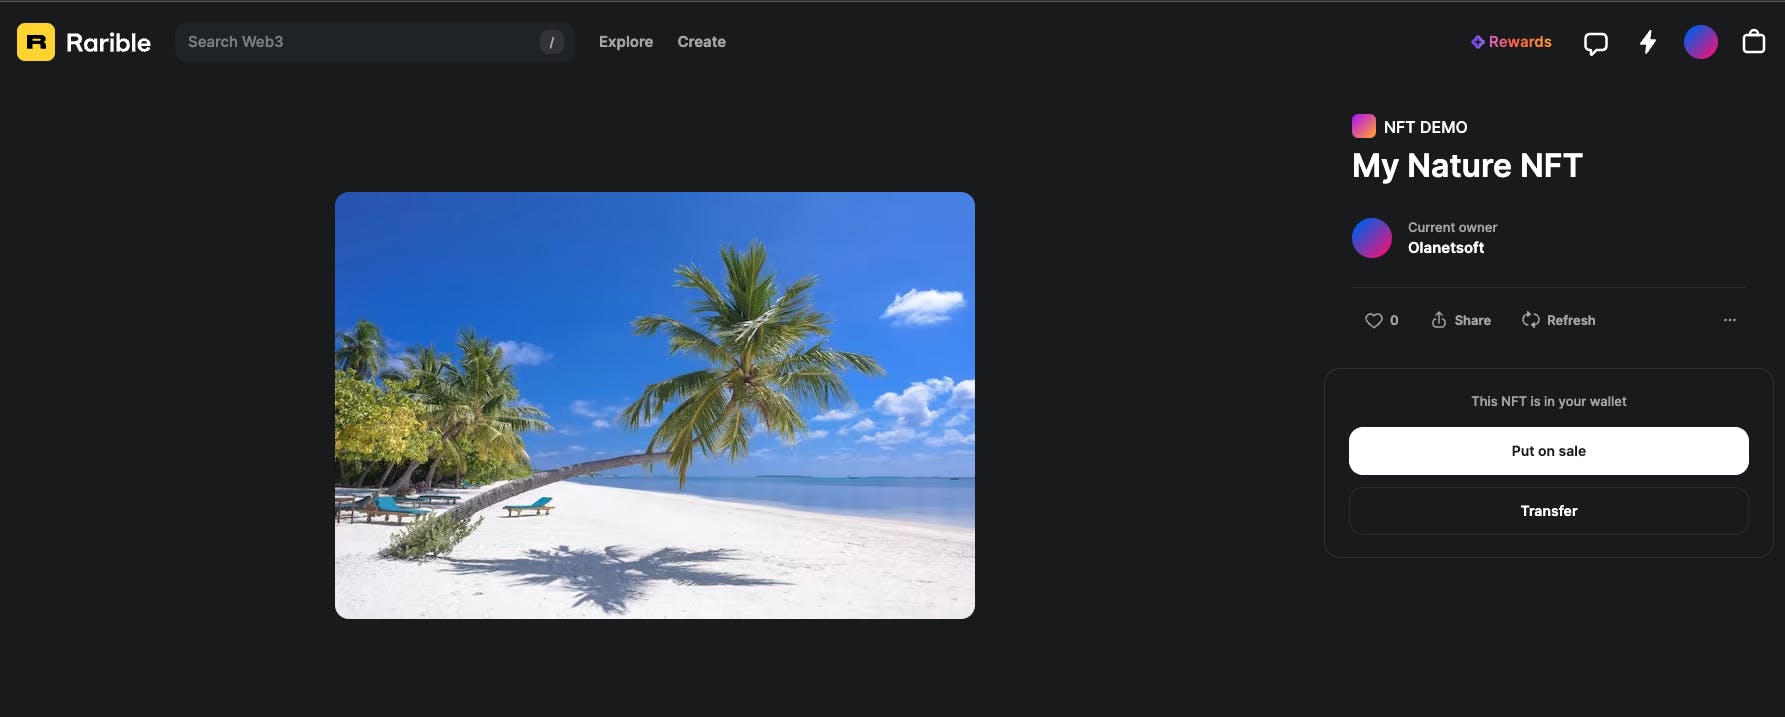
Verify Minted NFT on OpenSea & Rarible
We successfully built and deployed an end-to-end NFT project using the Truffle stack in the previous steps. In this section, let’s verify our minted NFT on OpenSea and Rarible.
Copy the contract address as shown below.

Paste your contract address into the search bar at testnets.opensea.io to check out your new NFT on OpenSea. If your metadata was entered correctly, your NFT should display properly.
Note: OpenSea can sometimes be slow to show your NFT metadata and image.
You can paste your contract address and check it out on testnet.rarible.com, as they retrieve NFT metadata faster than OpenSea, as shown below.
Conclusion
This article introduced you to the Truffle Suite of tools and how they can be used with Infura and MetaMask to create an end-to-end NFT project. You also learned that Truffle Boxes are an easy way to build projects quickly.
Development in Web3 does not need to be difficult, especially when there are tools you can use in every step of the process.
To learn more about the Truffle stack or to continue building, check out their docs.
Have a really great day!